It’s officially year 5 of our urban farmhouse makeover, and we are still busy doing projects [actually finishing what we started]!
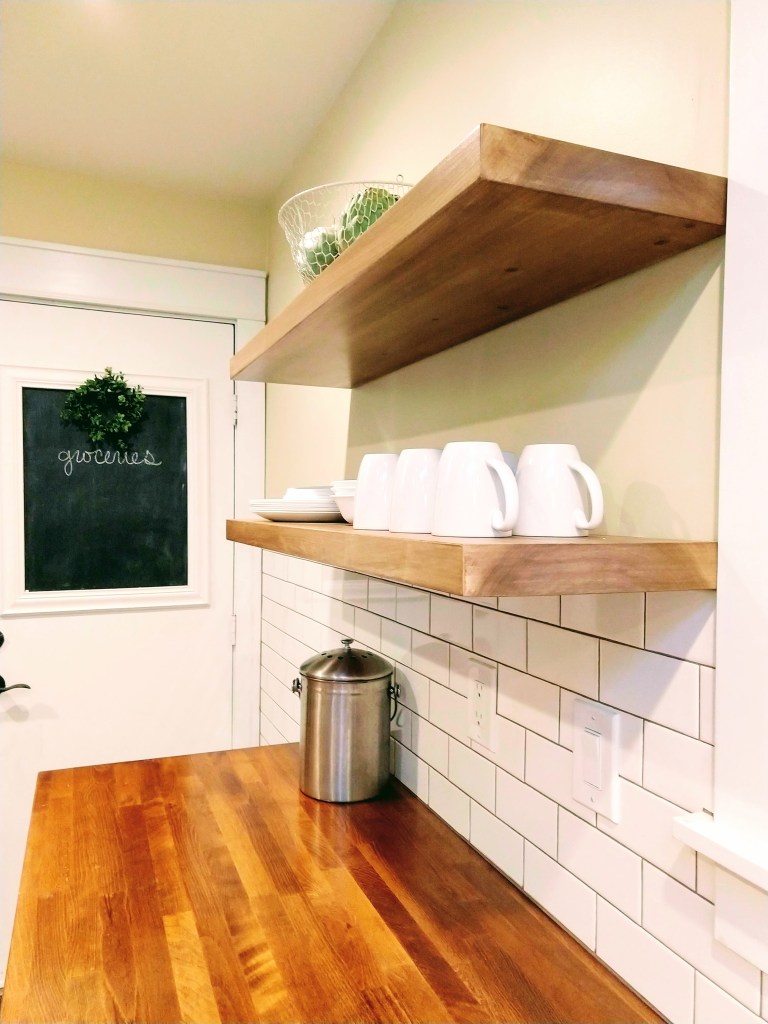
Keeping the theme of bright, simple, and airy, we decided to go with open shelving instead of traditional upper cabinetry. Honestly, our number one contributing factor when deciding this was budget. For 4 solid beautiful Poplar shelves, including hardware and stain, we spent a little under 200 dollars. What we had originally planned was to have two classic upper cabinets with glass fronts. Even Ikea’s options which are notoriously reasonable would have set us back around 600 bucks for a pair.
An added bonus of the open shelving is I actually have to keep things neat. Incentive is always a good thing…
After some searching at our local lumber yards, Brian was able to score some gorgeous 1 and 3/4″ Poplar for 135 bucks for two 8′ pieces. He got it from http://www.aurahardwoods.com/
Growing up in construction, I have developed a unique appreciation for wood. A soft spot for it really. It’s decidedly un-girly of me but the sappy smell of pine and the site of a beautiful cut of old wood brought back to it’s original glory with a little sanding and stain makes me one happy woman. Anyway, I digress.
Initially, we had settled for some metal shelving we got on an impulse buy at Ikea. The look was just wrong for our house. Too much stainless, not enough charm. We never even got around to installing the second set. You can see them here behind the boys (don’t be too distracted by their cuteness).

Fresh wood. So much “scope for imagination”.
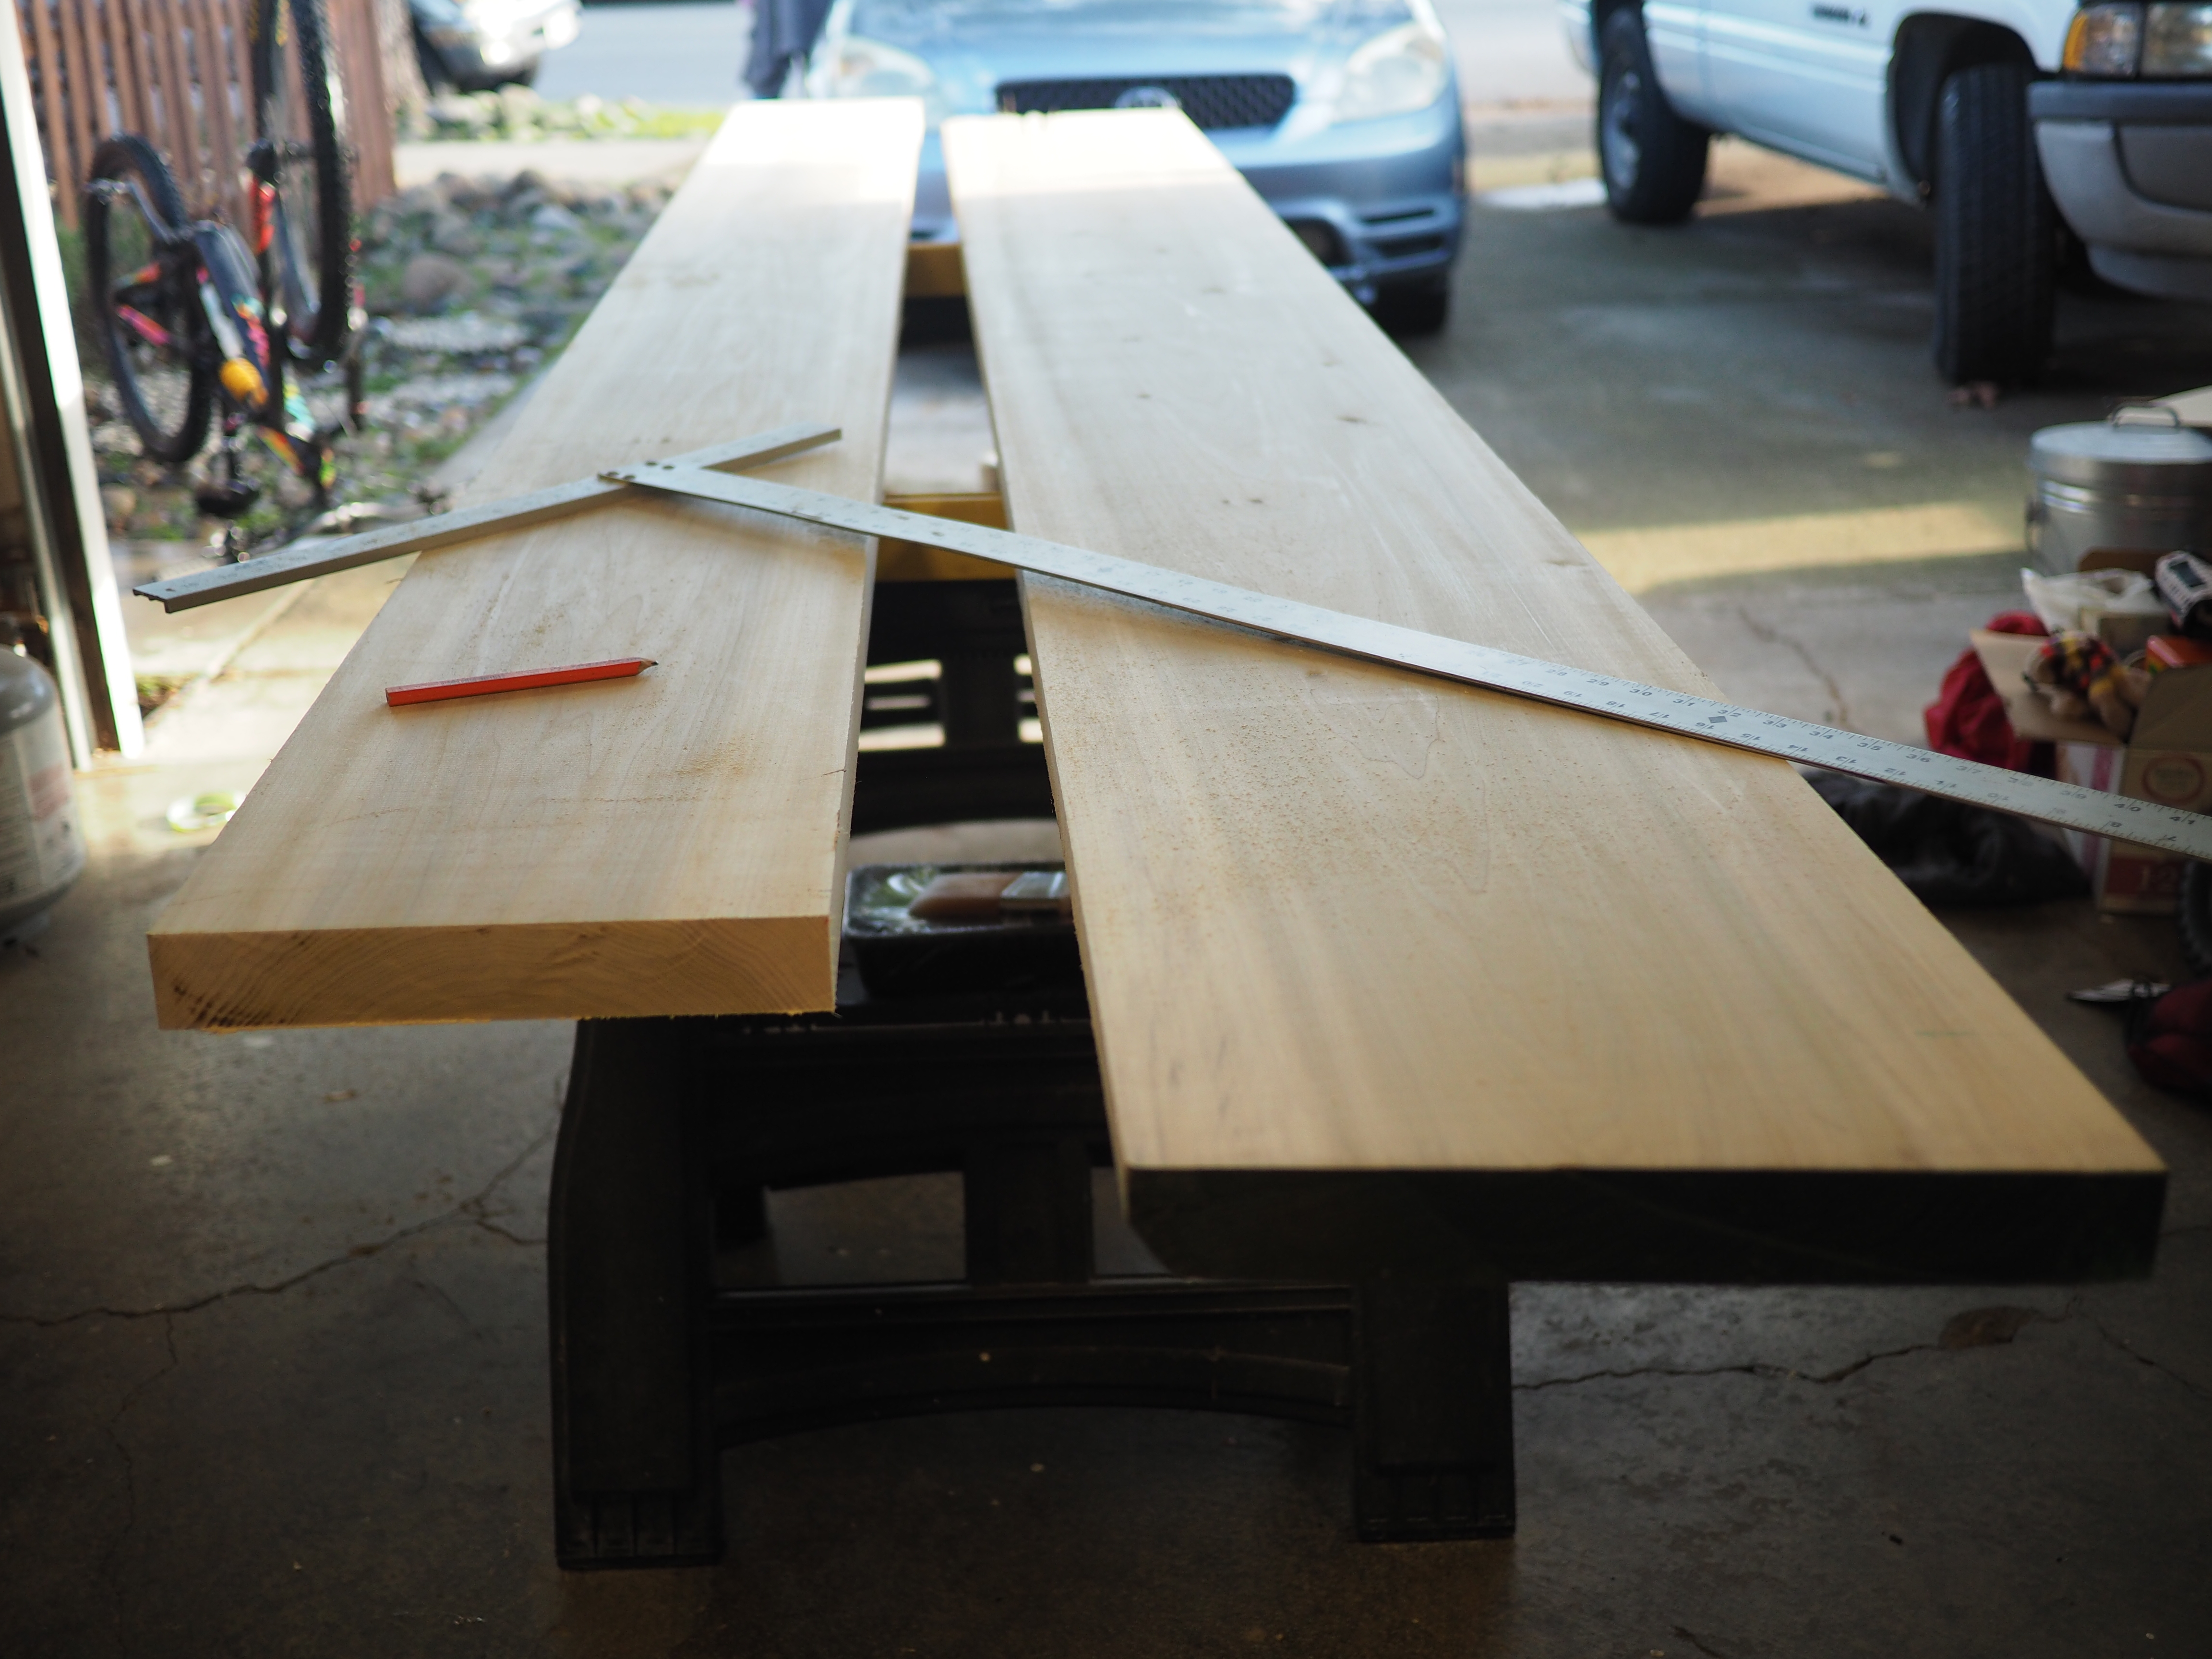
Brian started with ripping the boards down to size.
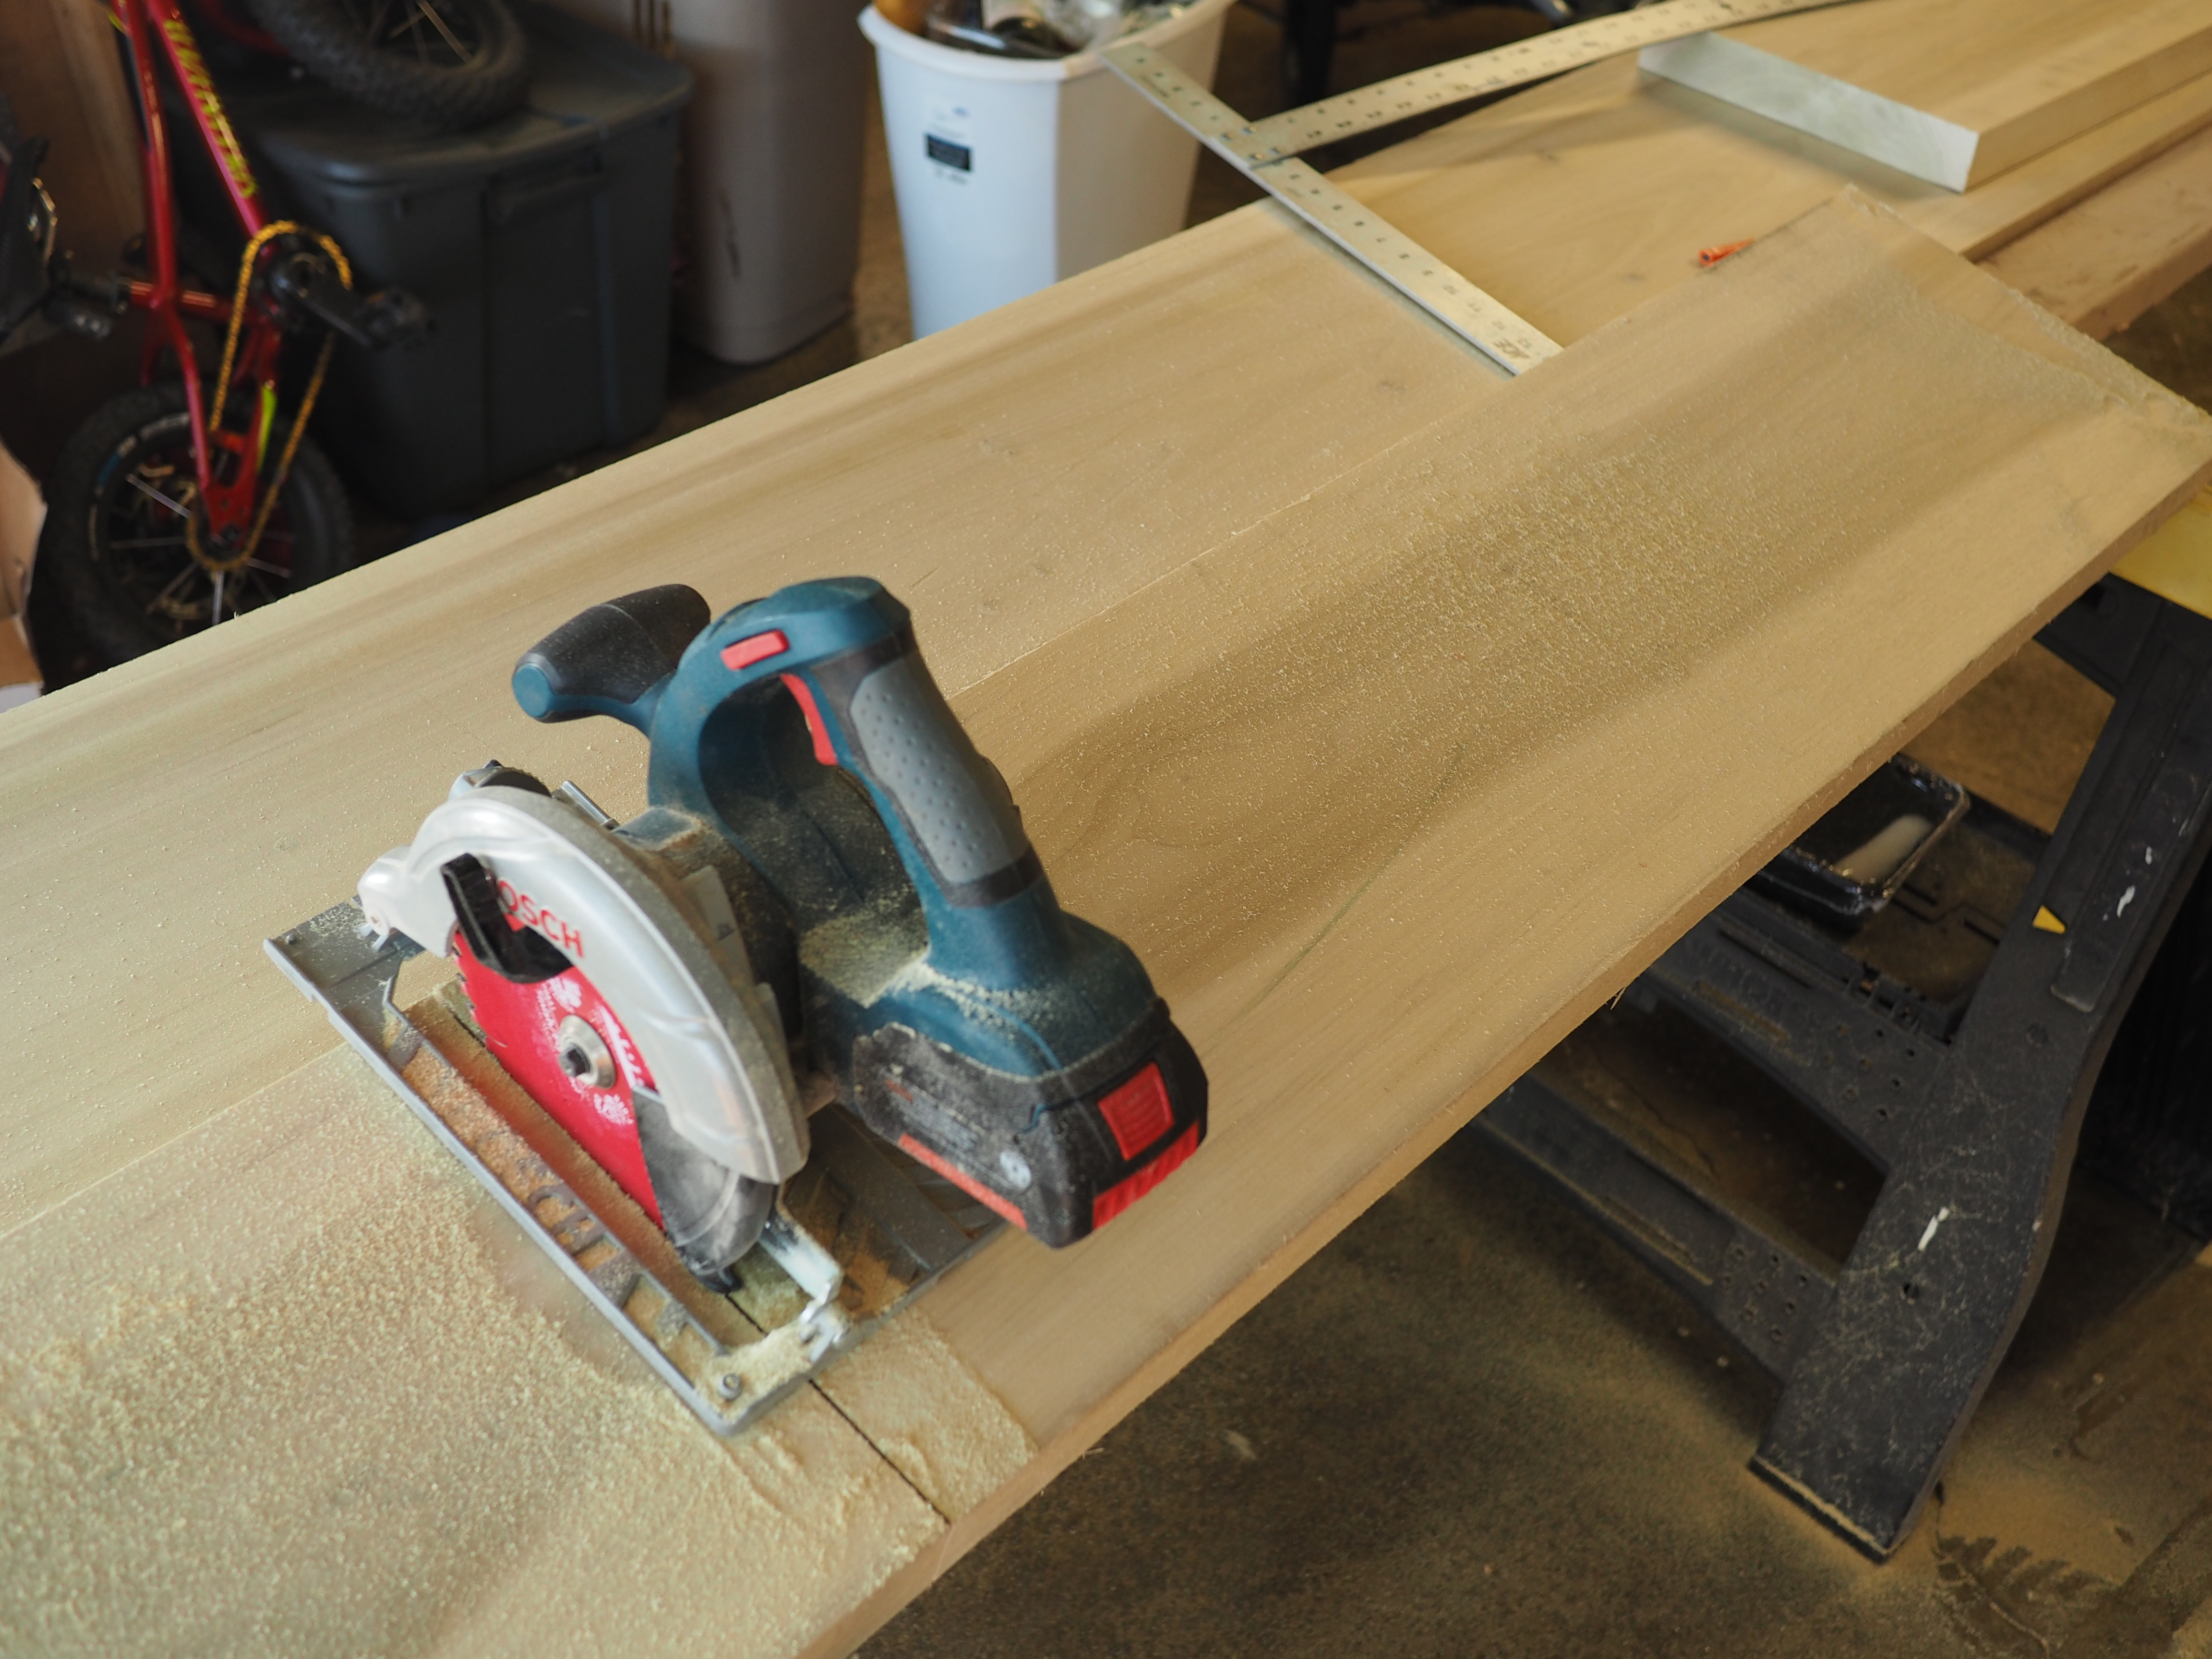
This left us with a pair at 42″ by 11″ and a pair at 35″ by 11″. We decided 11 inches in depth would be enough room for a dinner plate but wouldn’t overwhelm our small space.
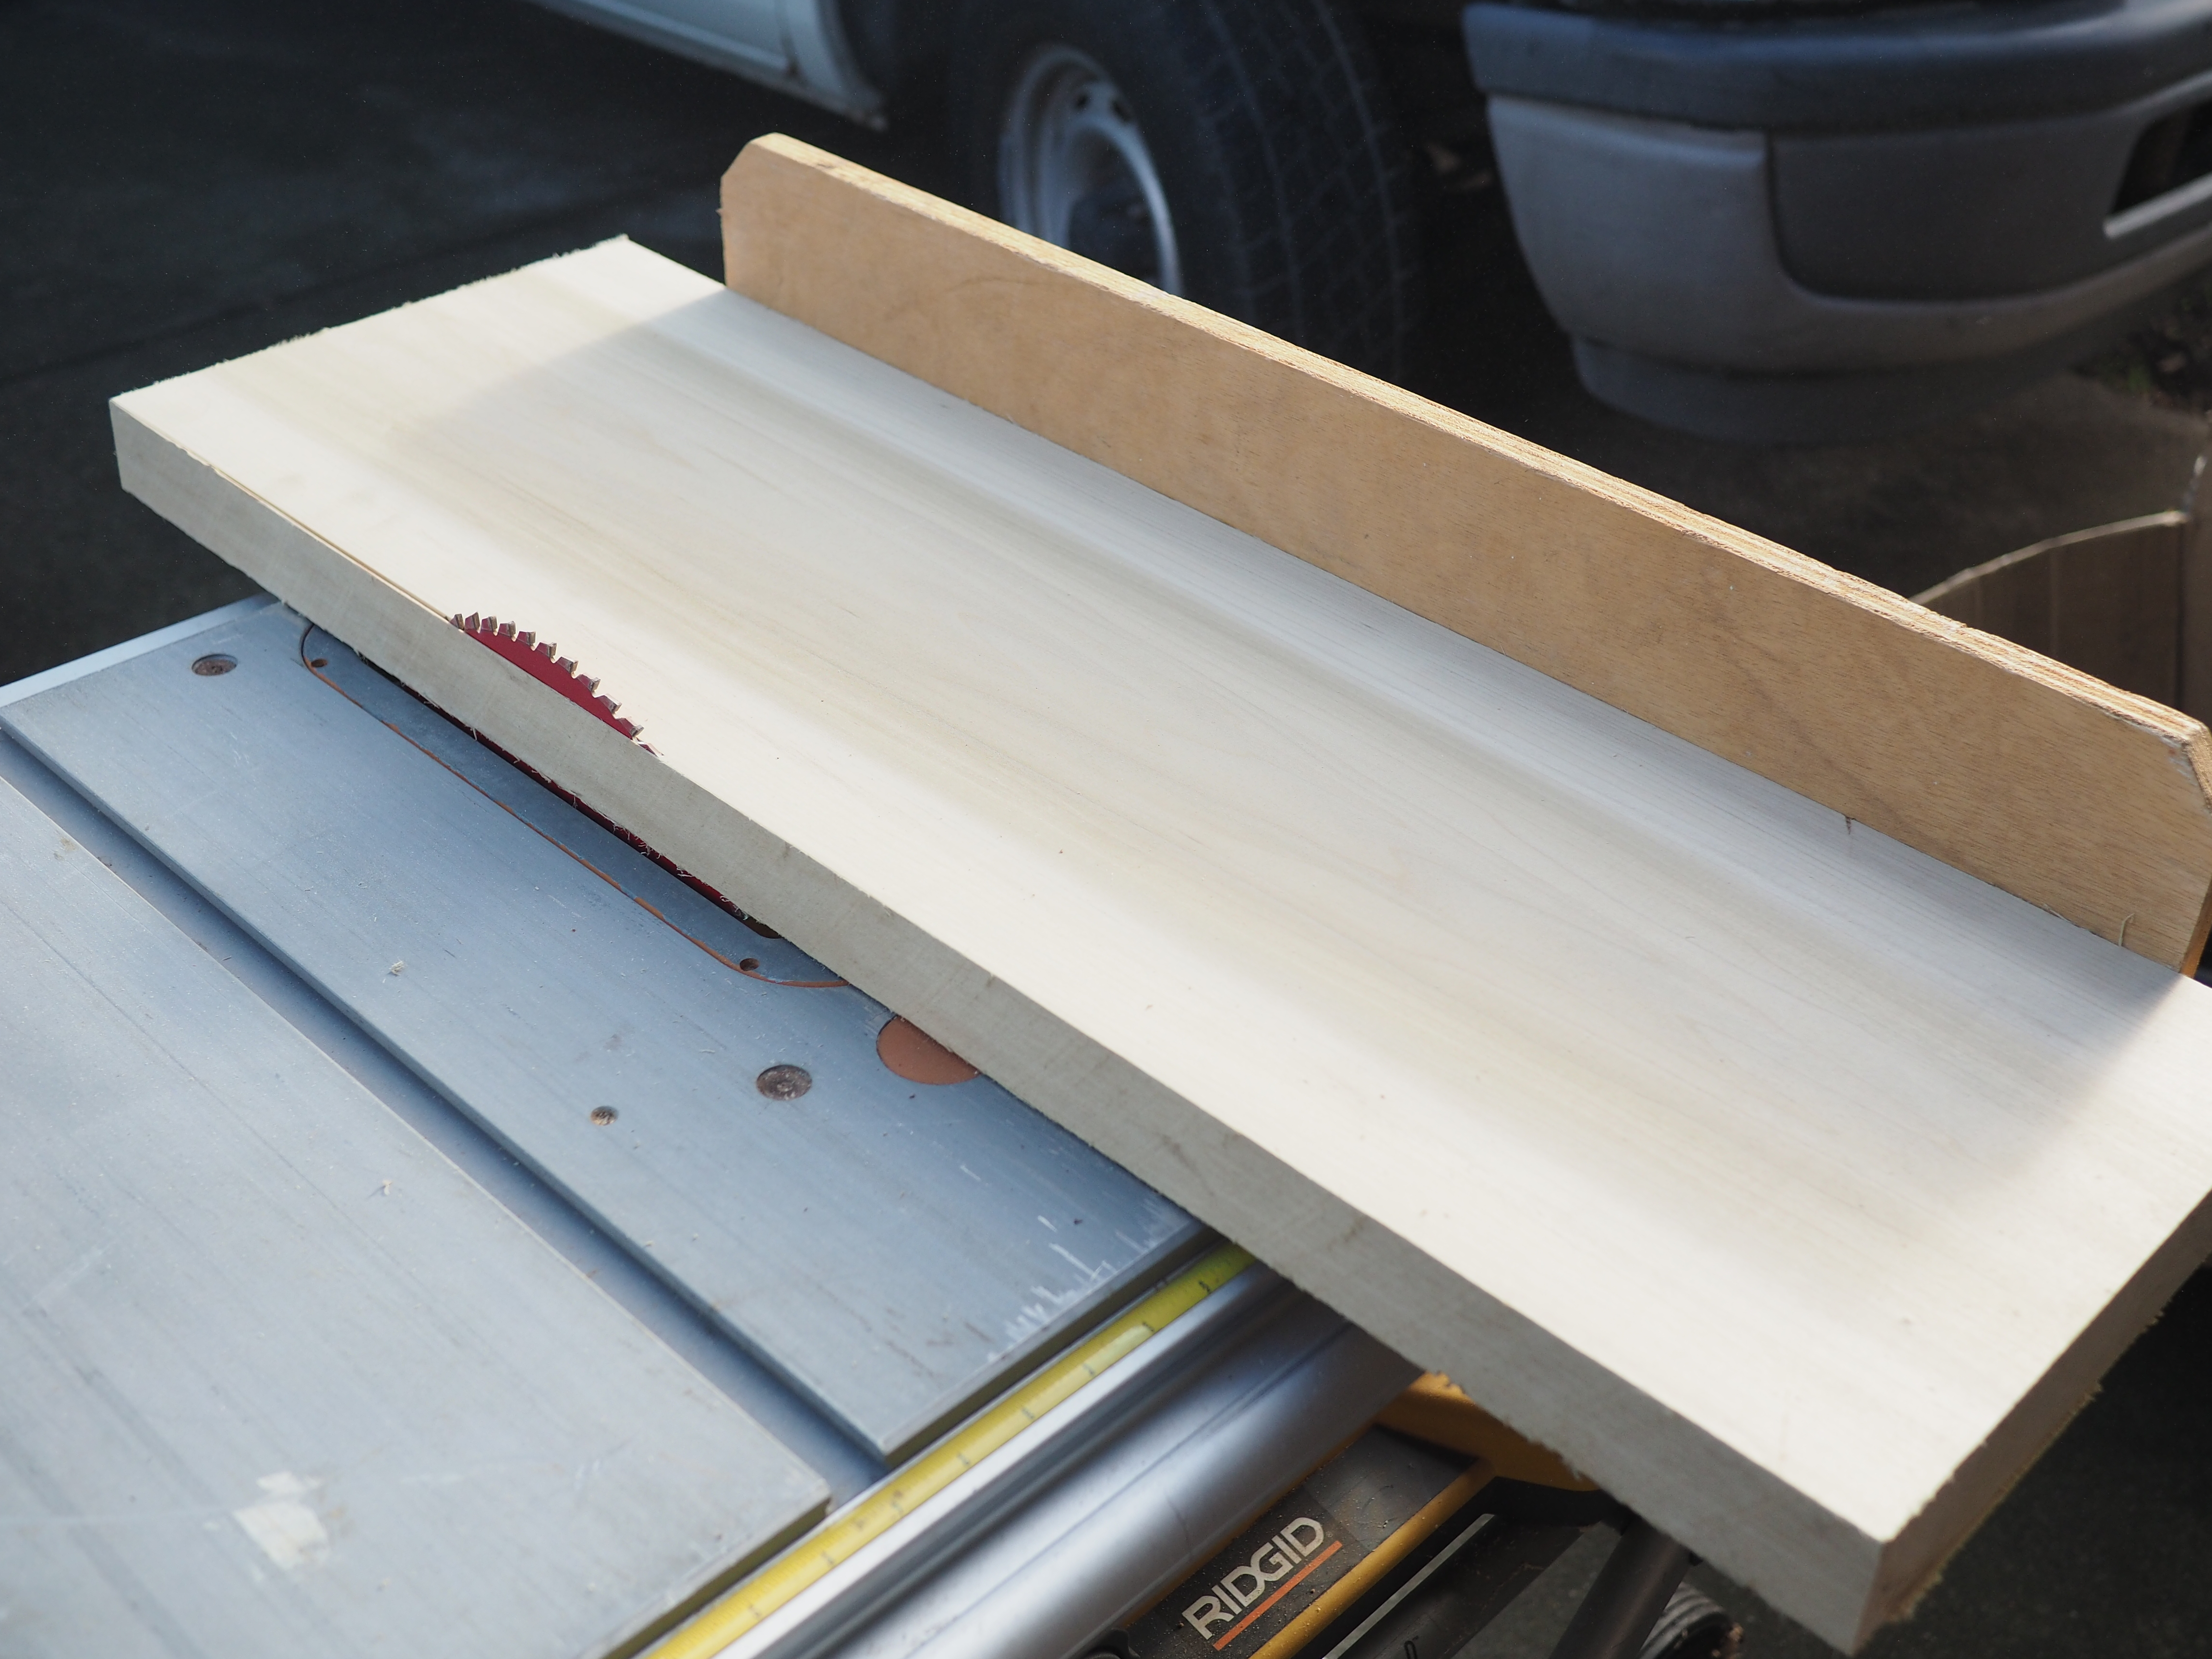
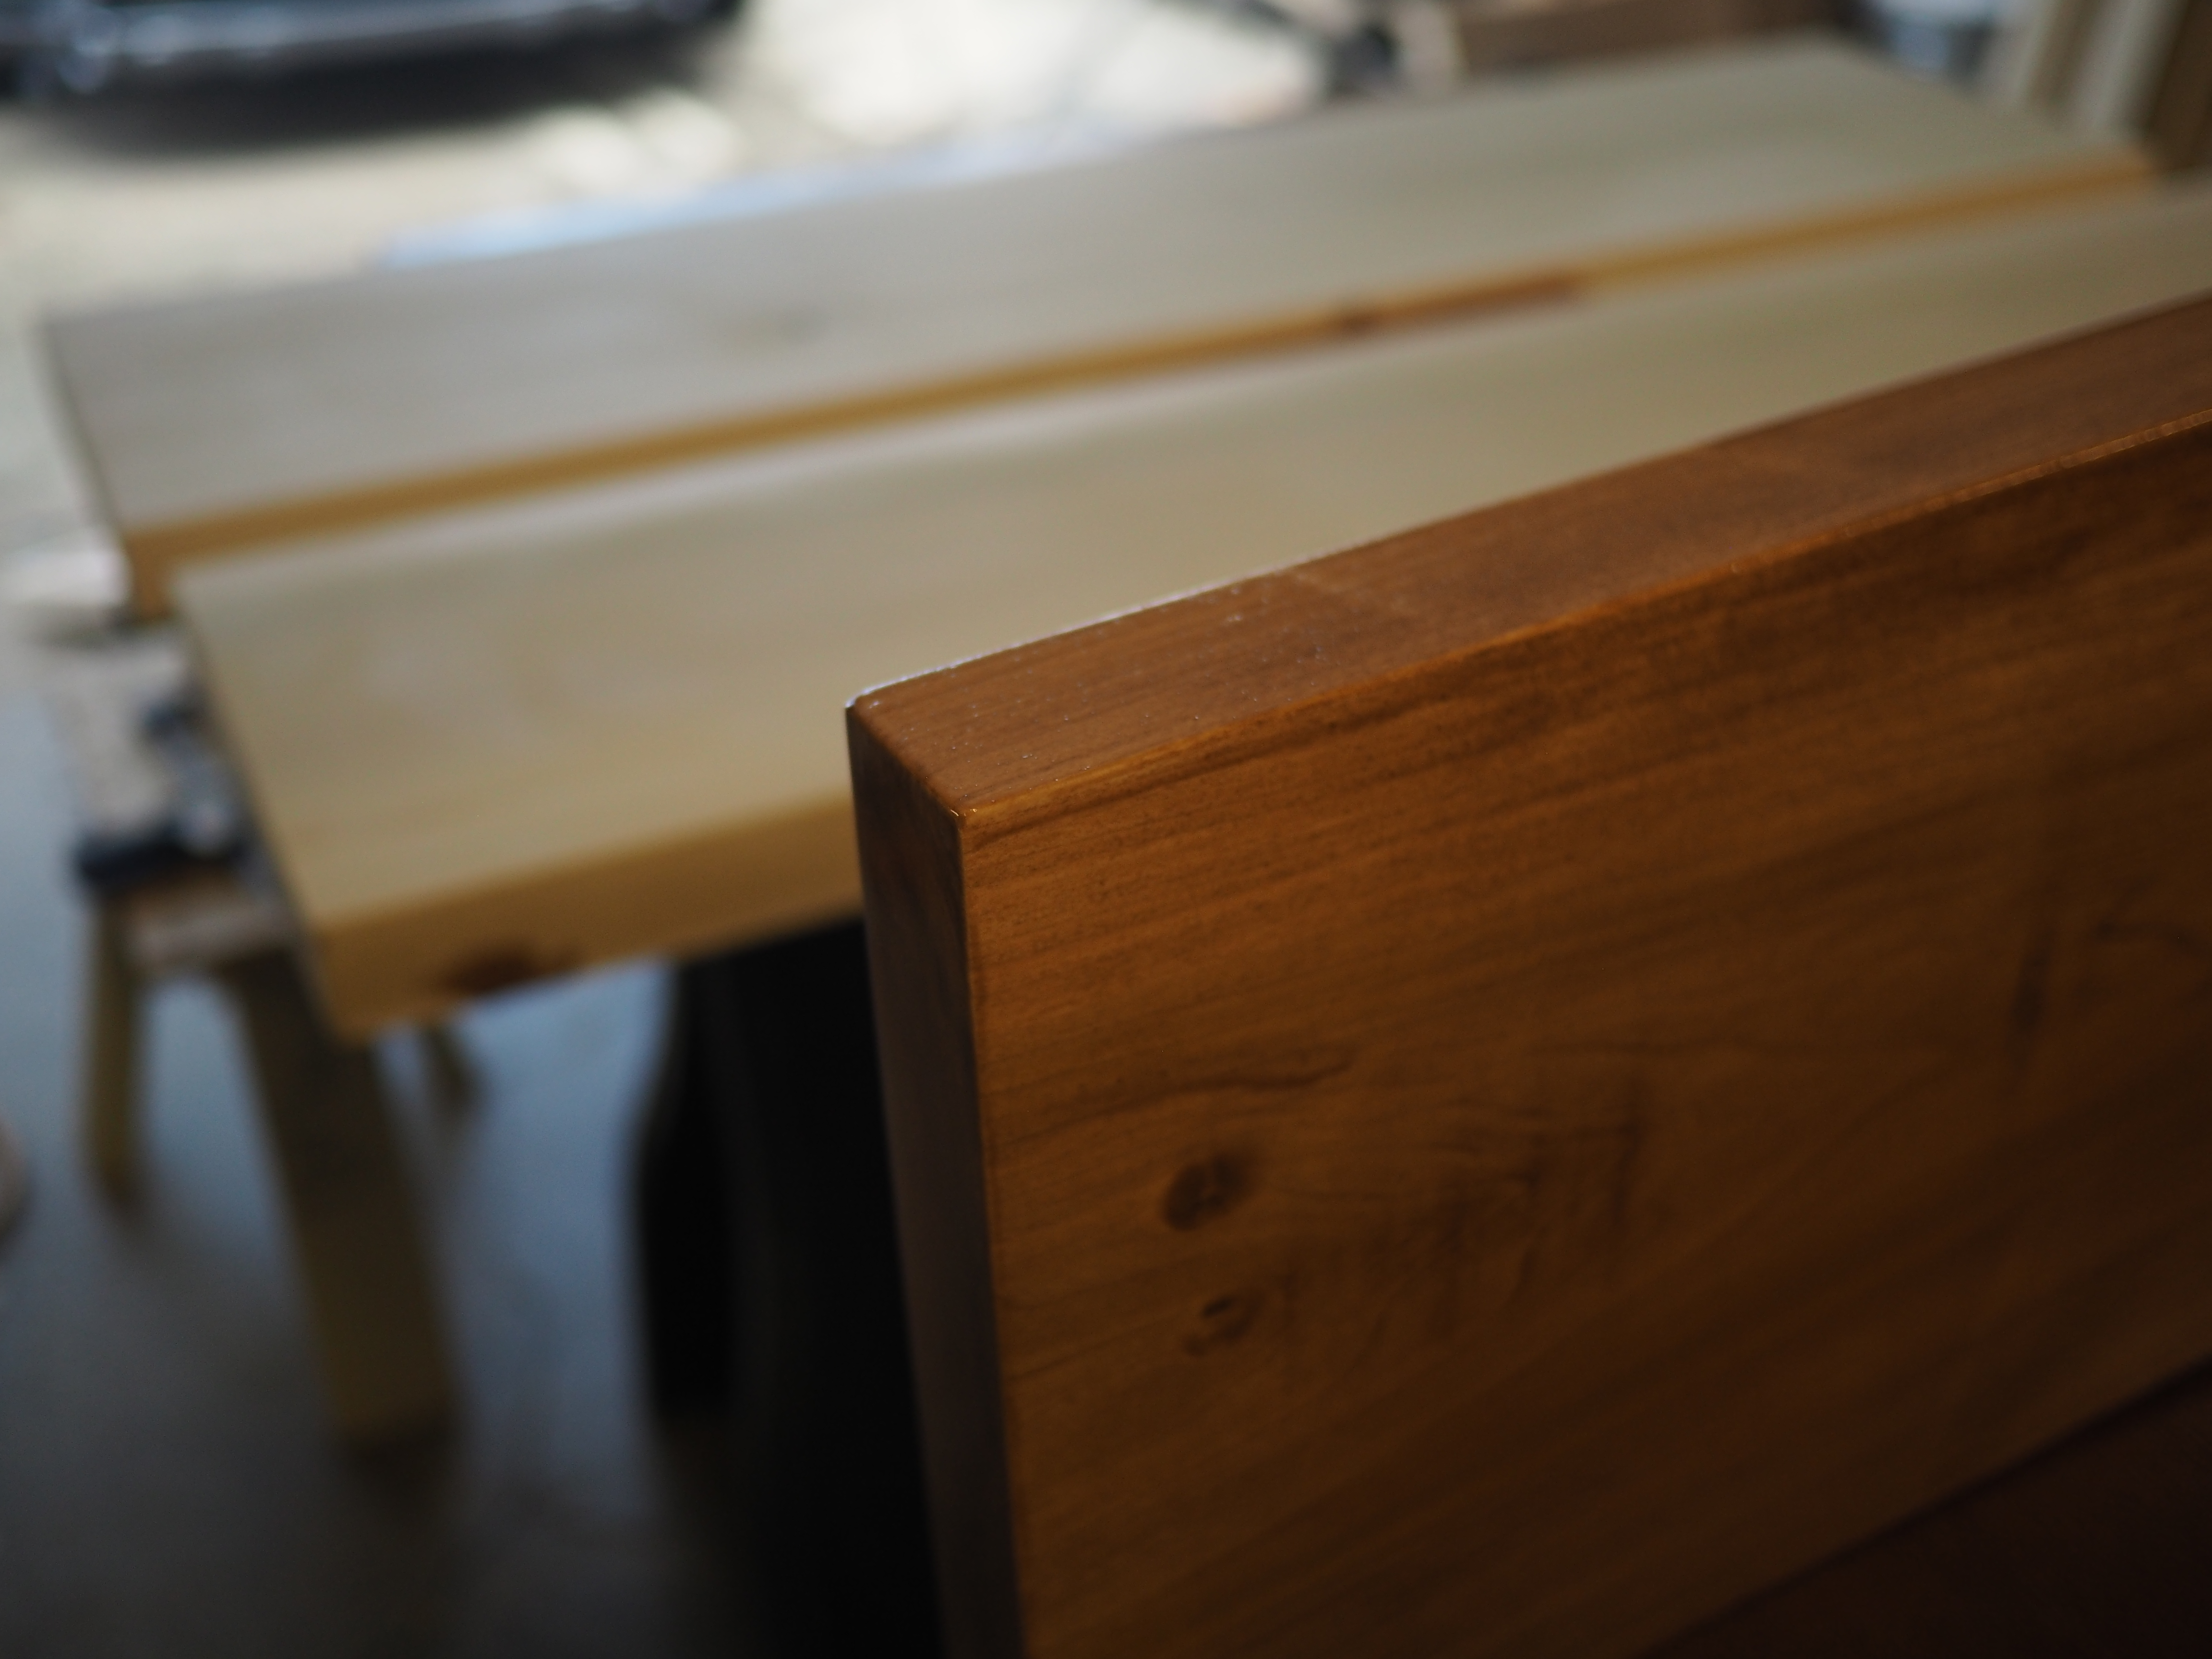
With a little grooming (sanding), they were ready for stain.

One of Brian’s many genius ideas was to rig up a little stand on an old door to create a stable surface during the staining process. They were screwed in on the blind side so no one was the wiser.

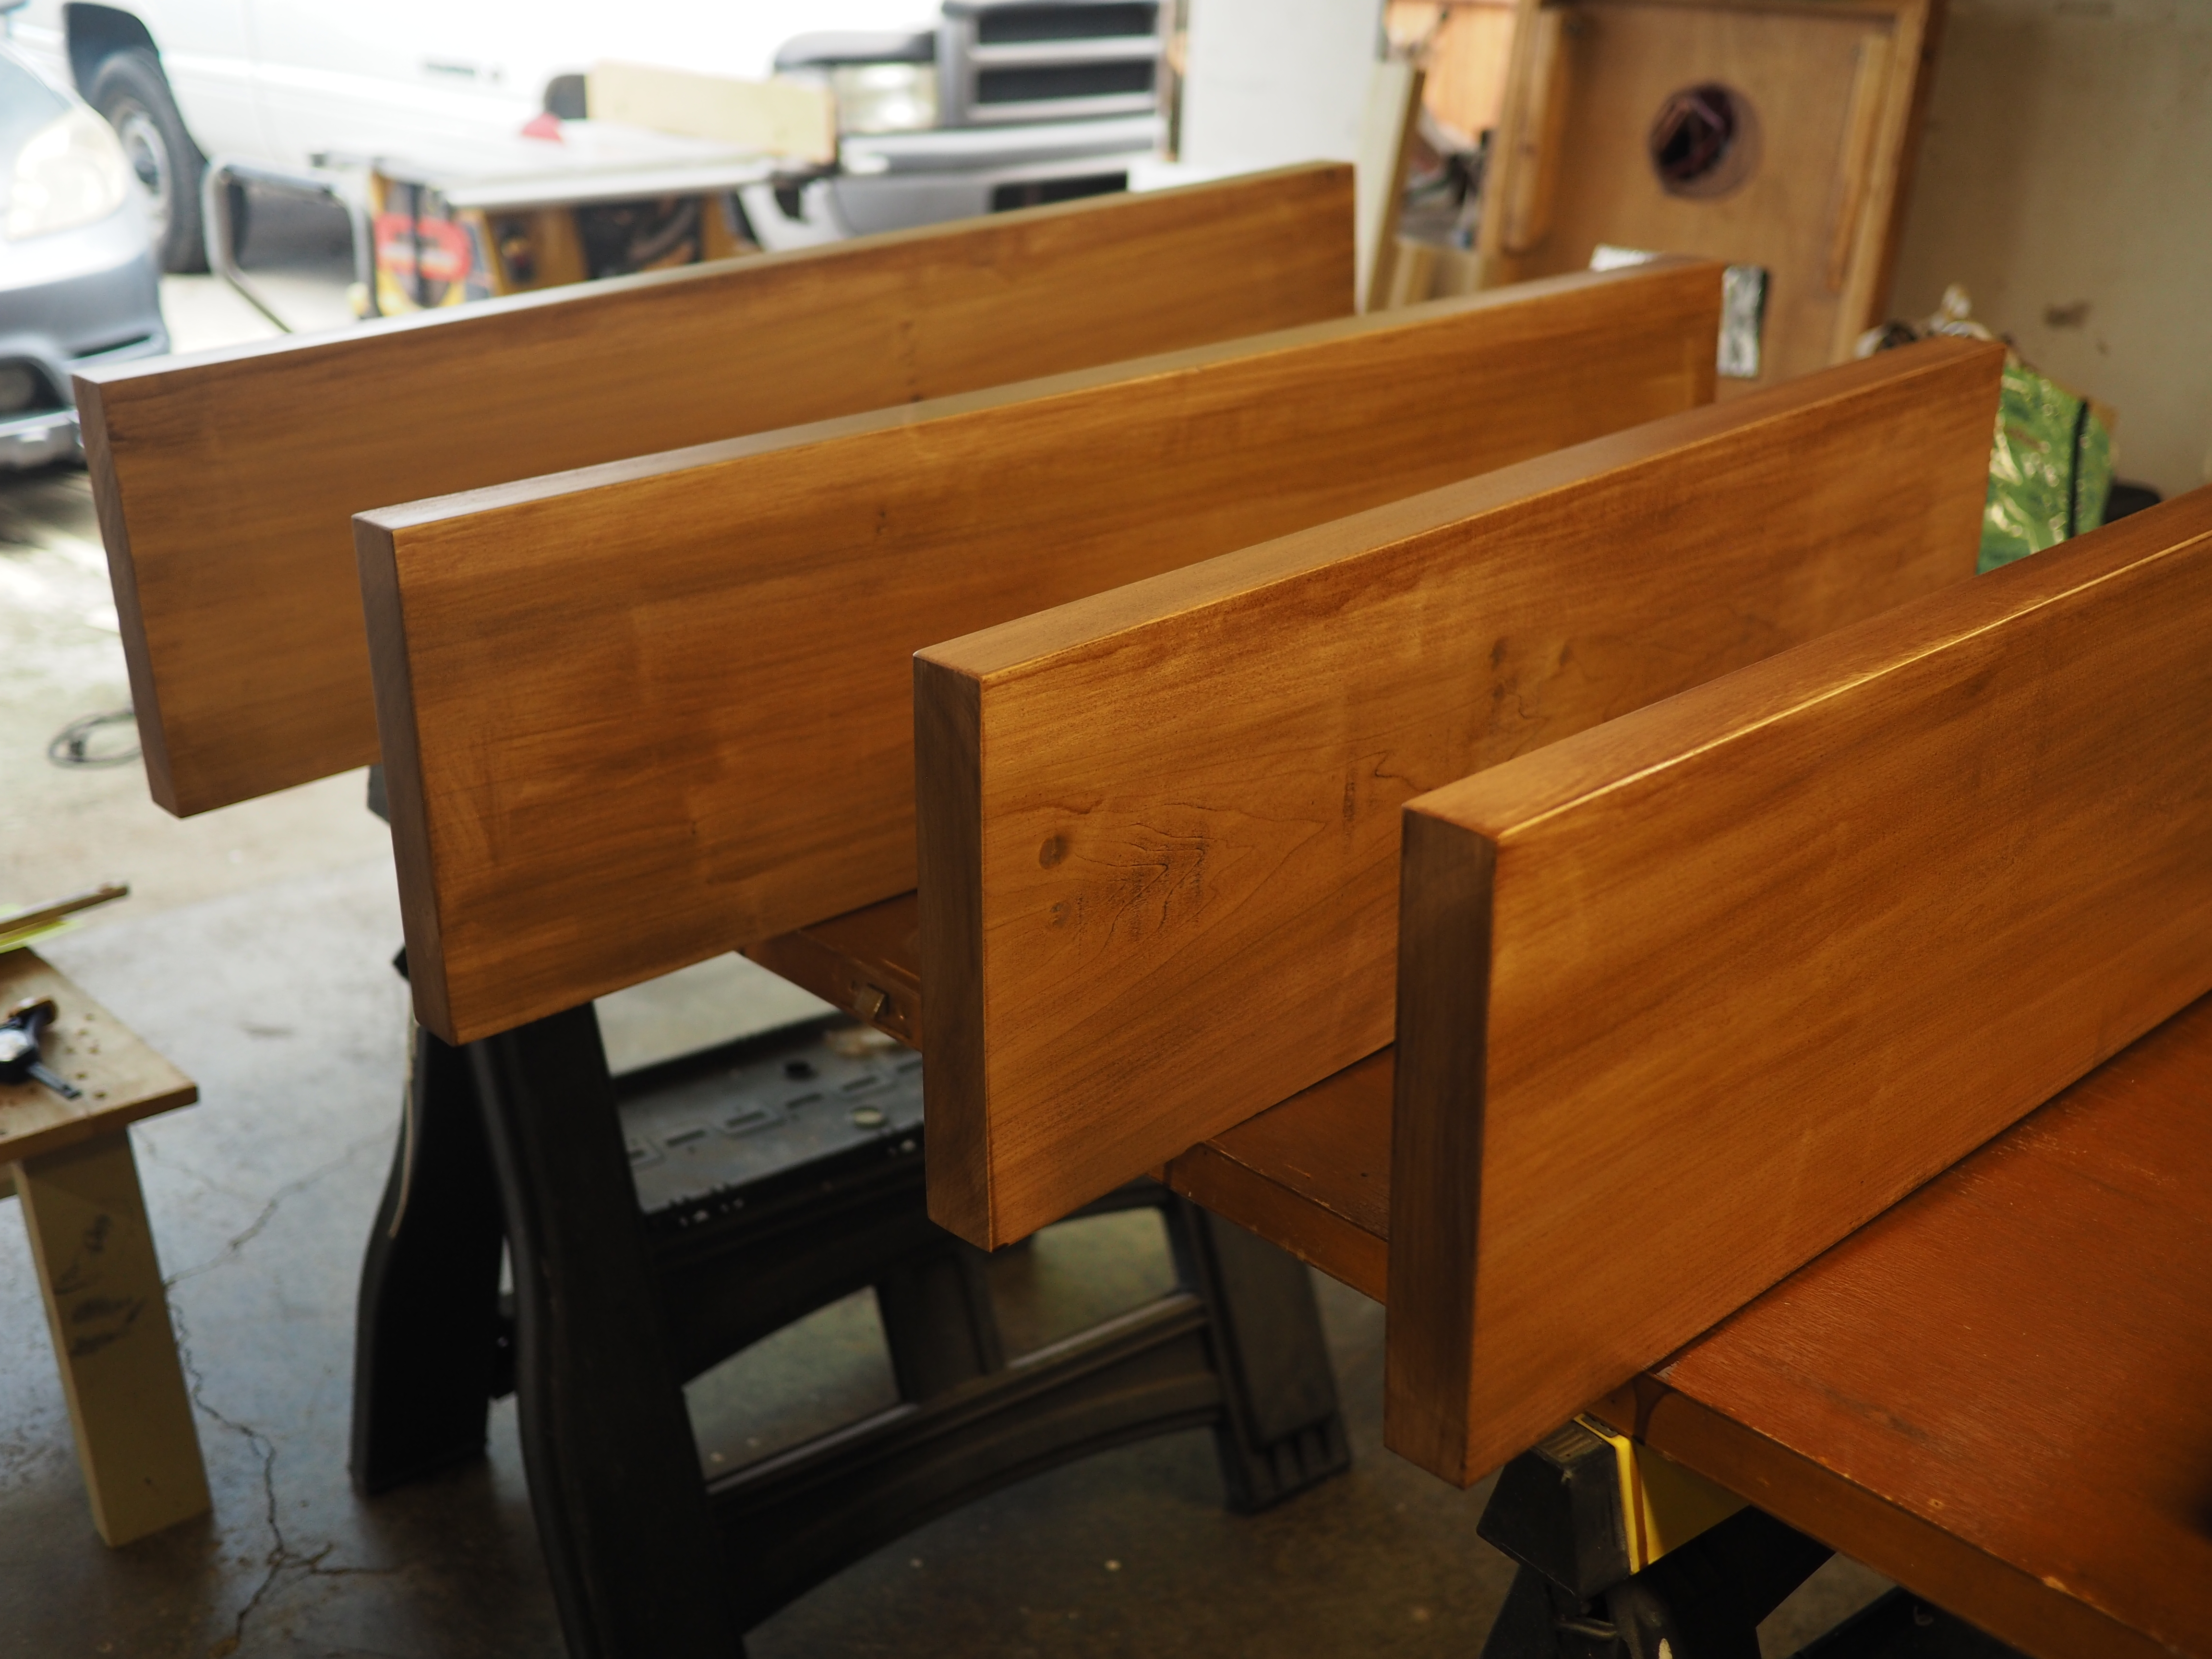
The stain we chose was a 1 to 5 mix of Mission Oak and Pecan MinWax Polyurethane in a satin finish. This was applied by brush and then finished off with two coats of clear Polyurethane rattle can spray. Poplar can have a pretty green cast so that’s why we went with a touch of the darker Mission Oak.
We found the https://livefreecreative.co/how-to-make-diy-floating-shelves/ article to be very helpful during this whole project. They did a beautiful job on their shelves.
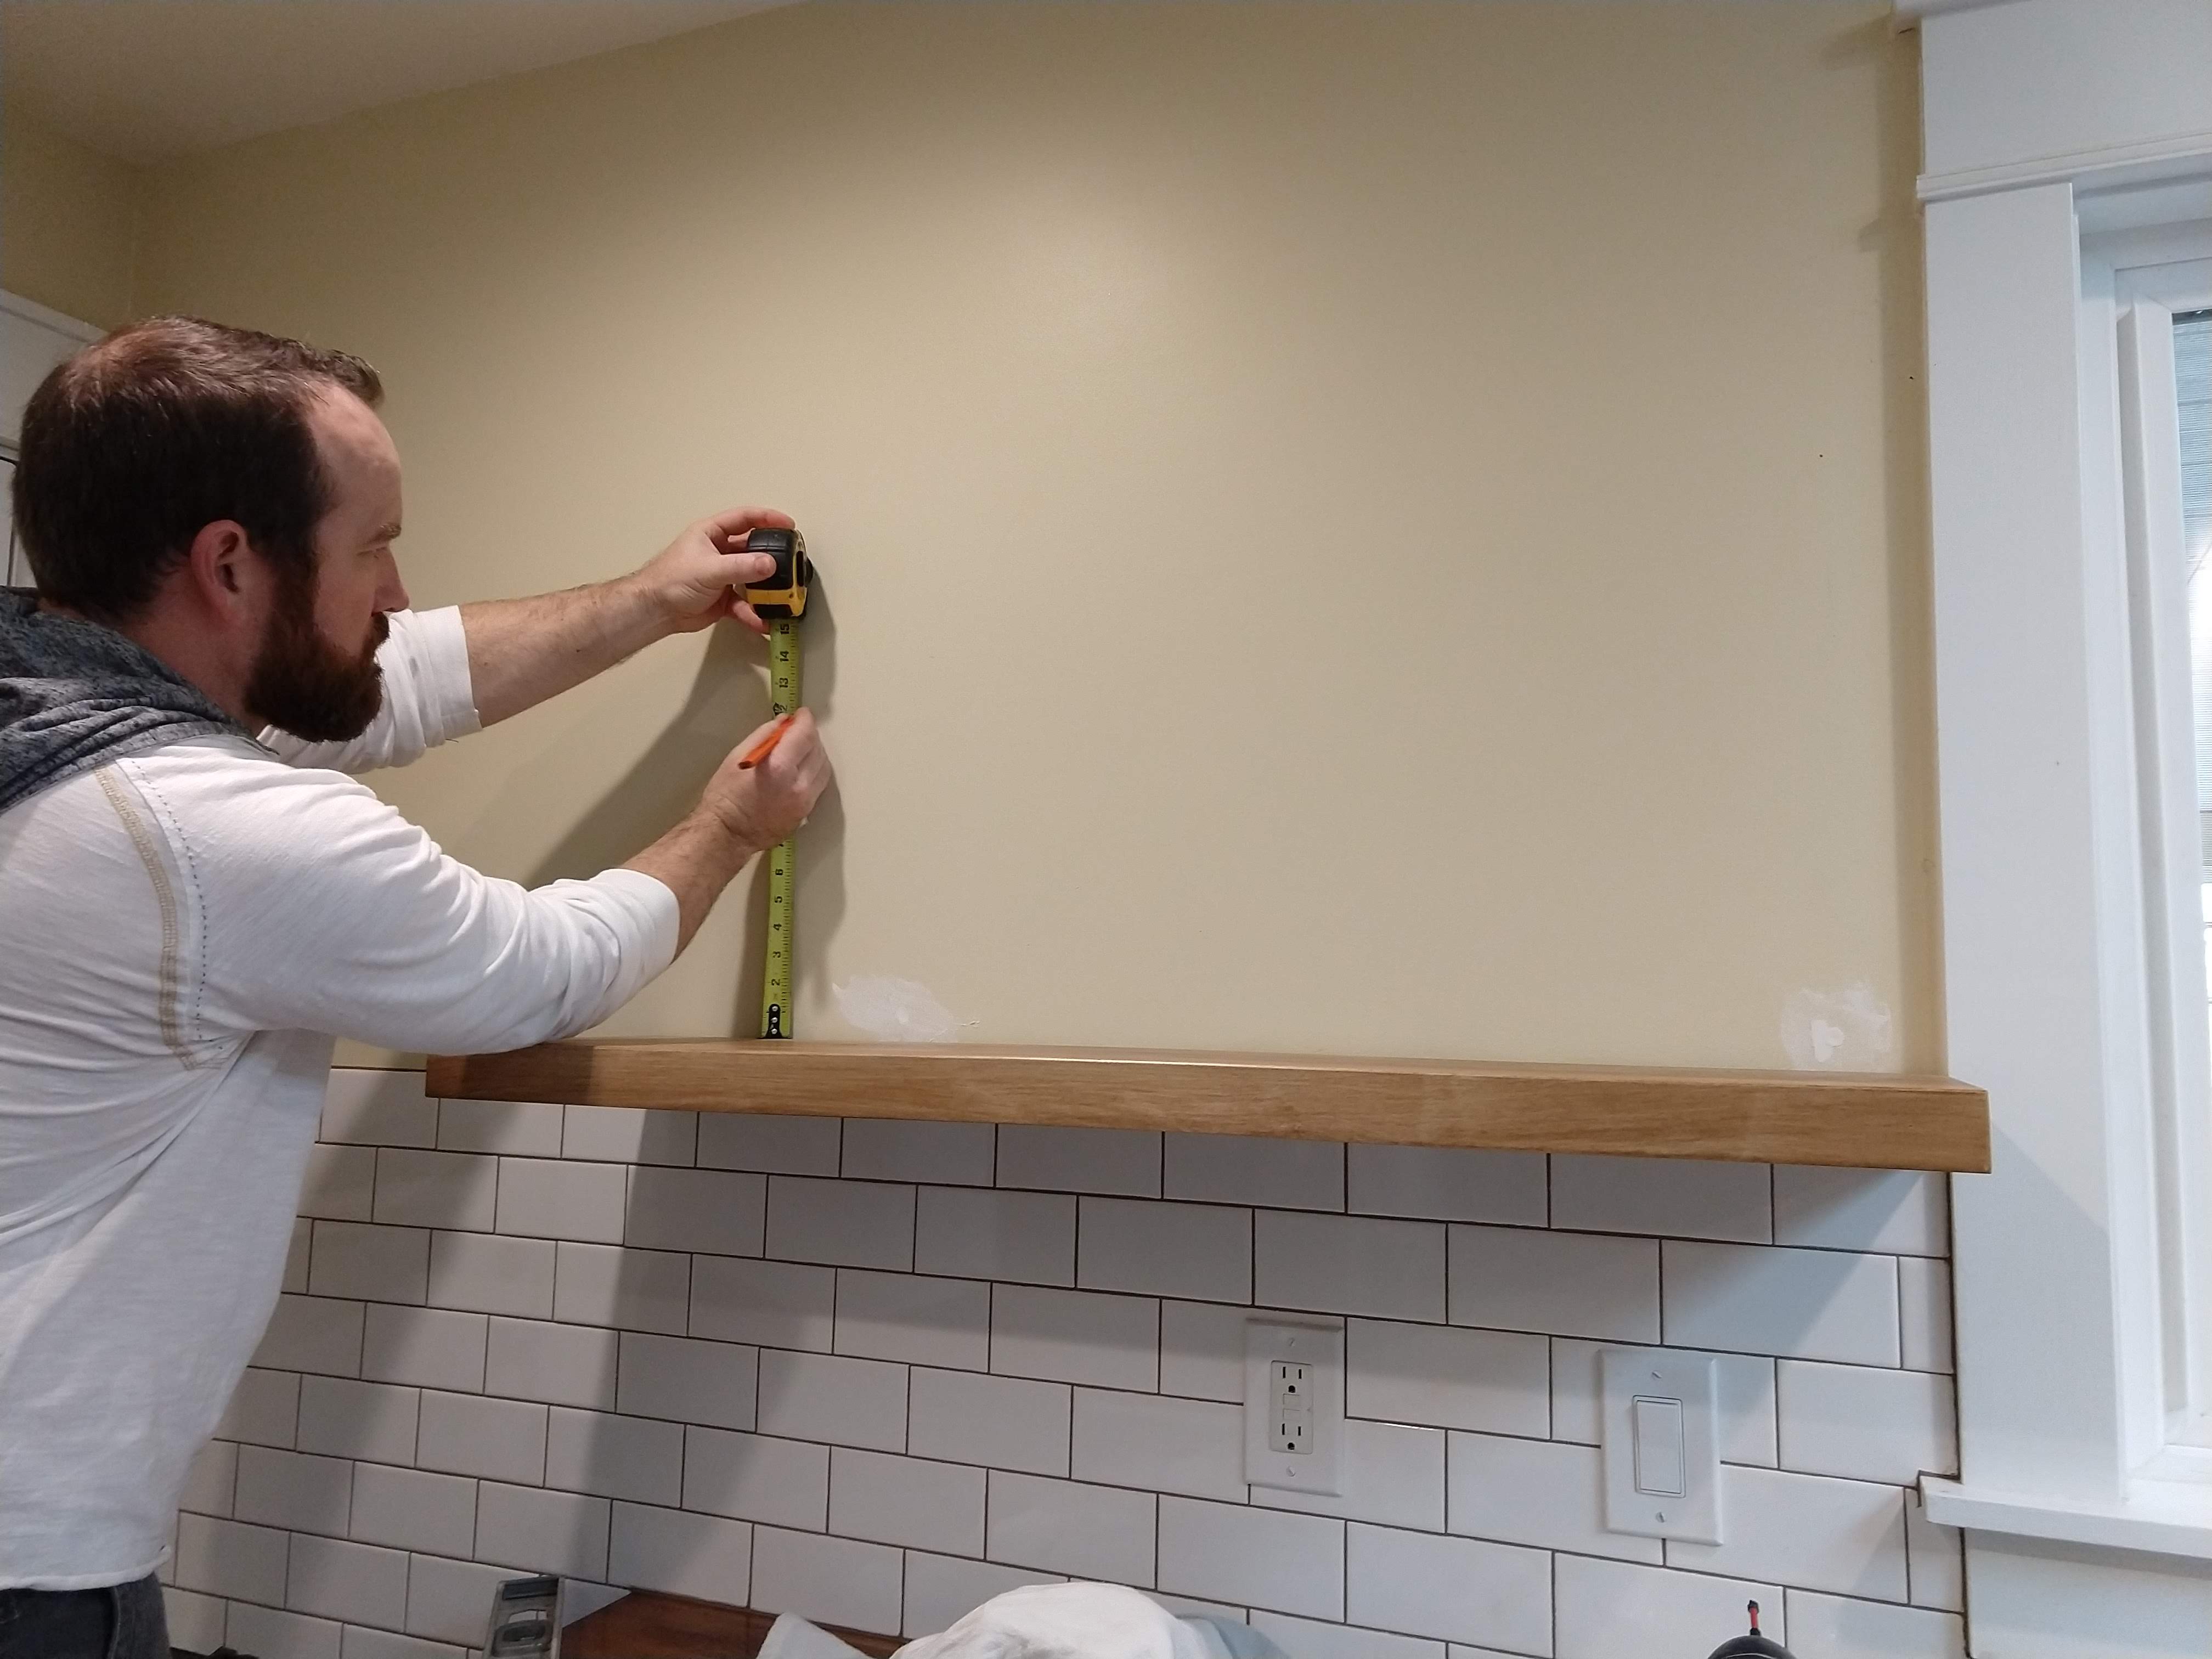
Once the stain had dried, it was time to fix the shelves to the wall. Using a stud-finder the floating shelf brackets were simply screwed in at the studs. You can get them on Amazon here; https://www.amazon.com/DAKODA-LOVE-Floating-Brackets-Supports/dp/B073WQ3GHW?ref_=fsclp_pl_dp_2
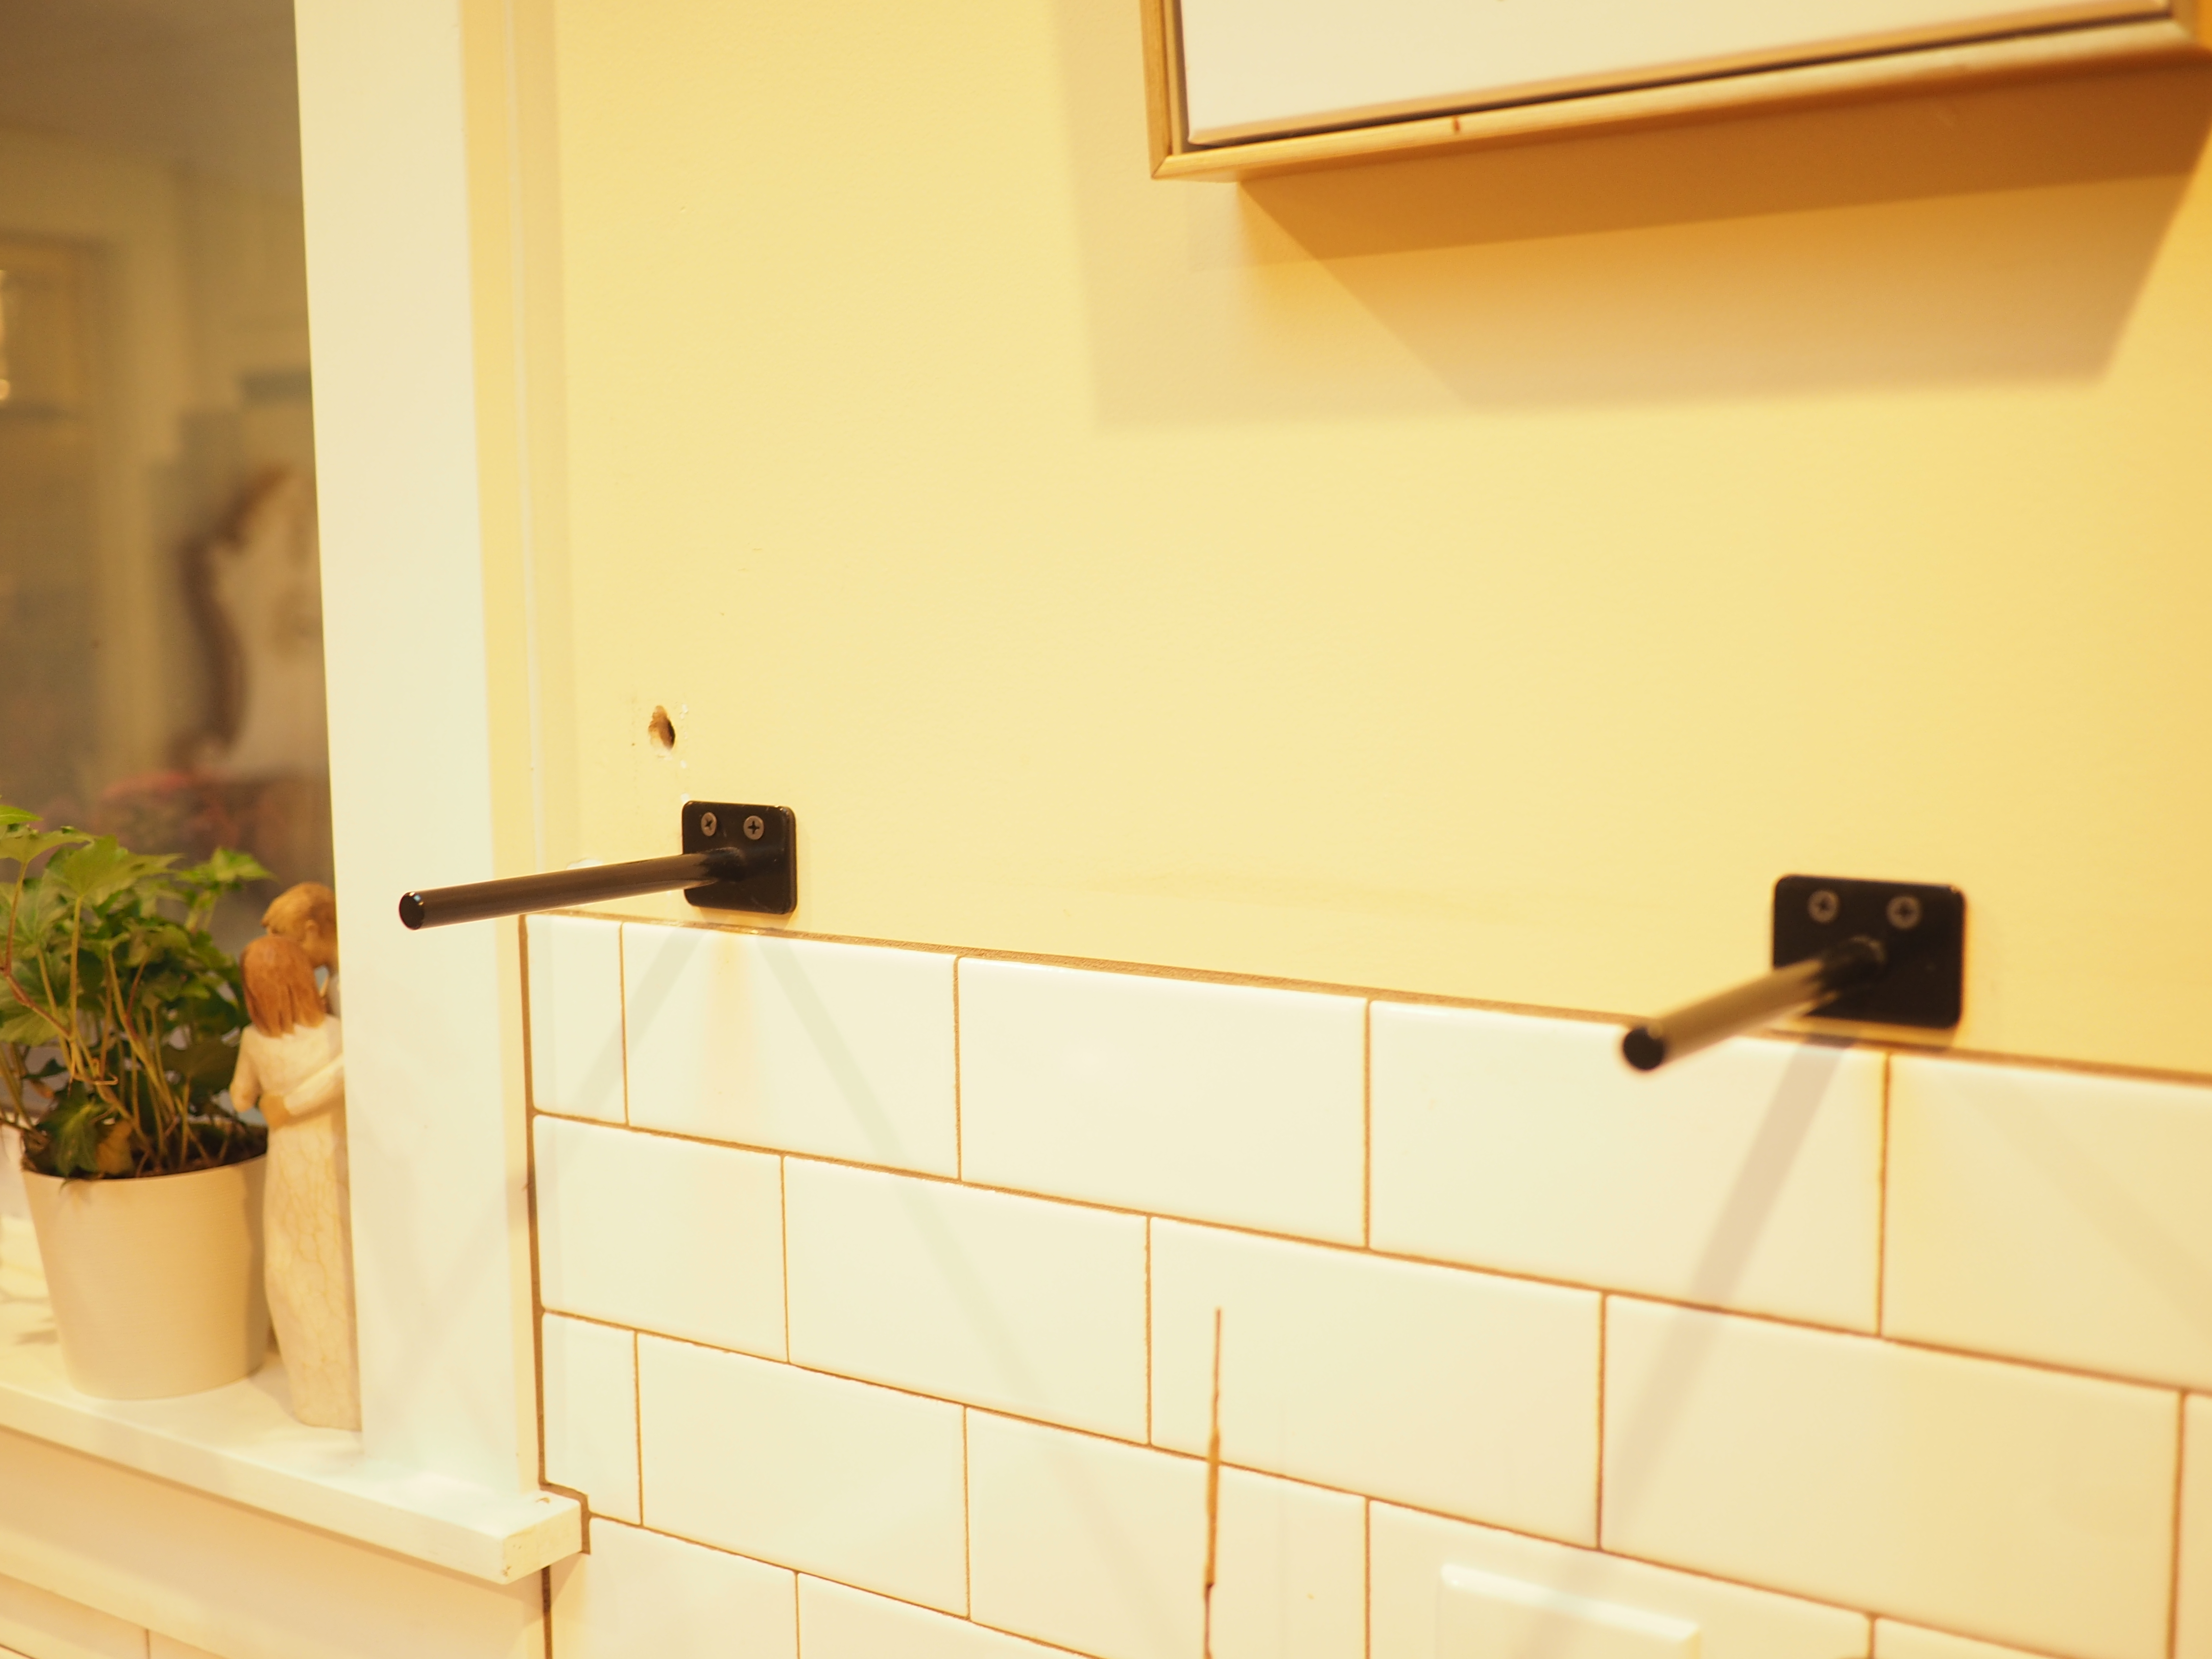
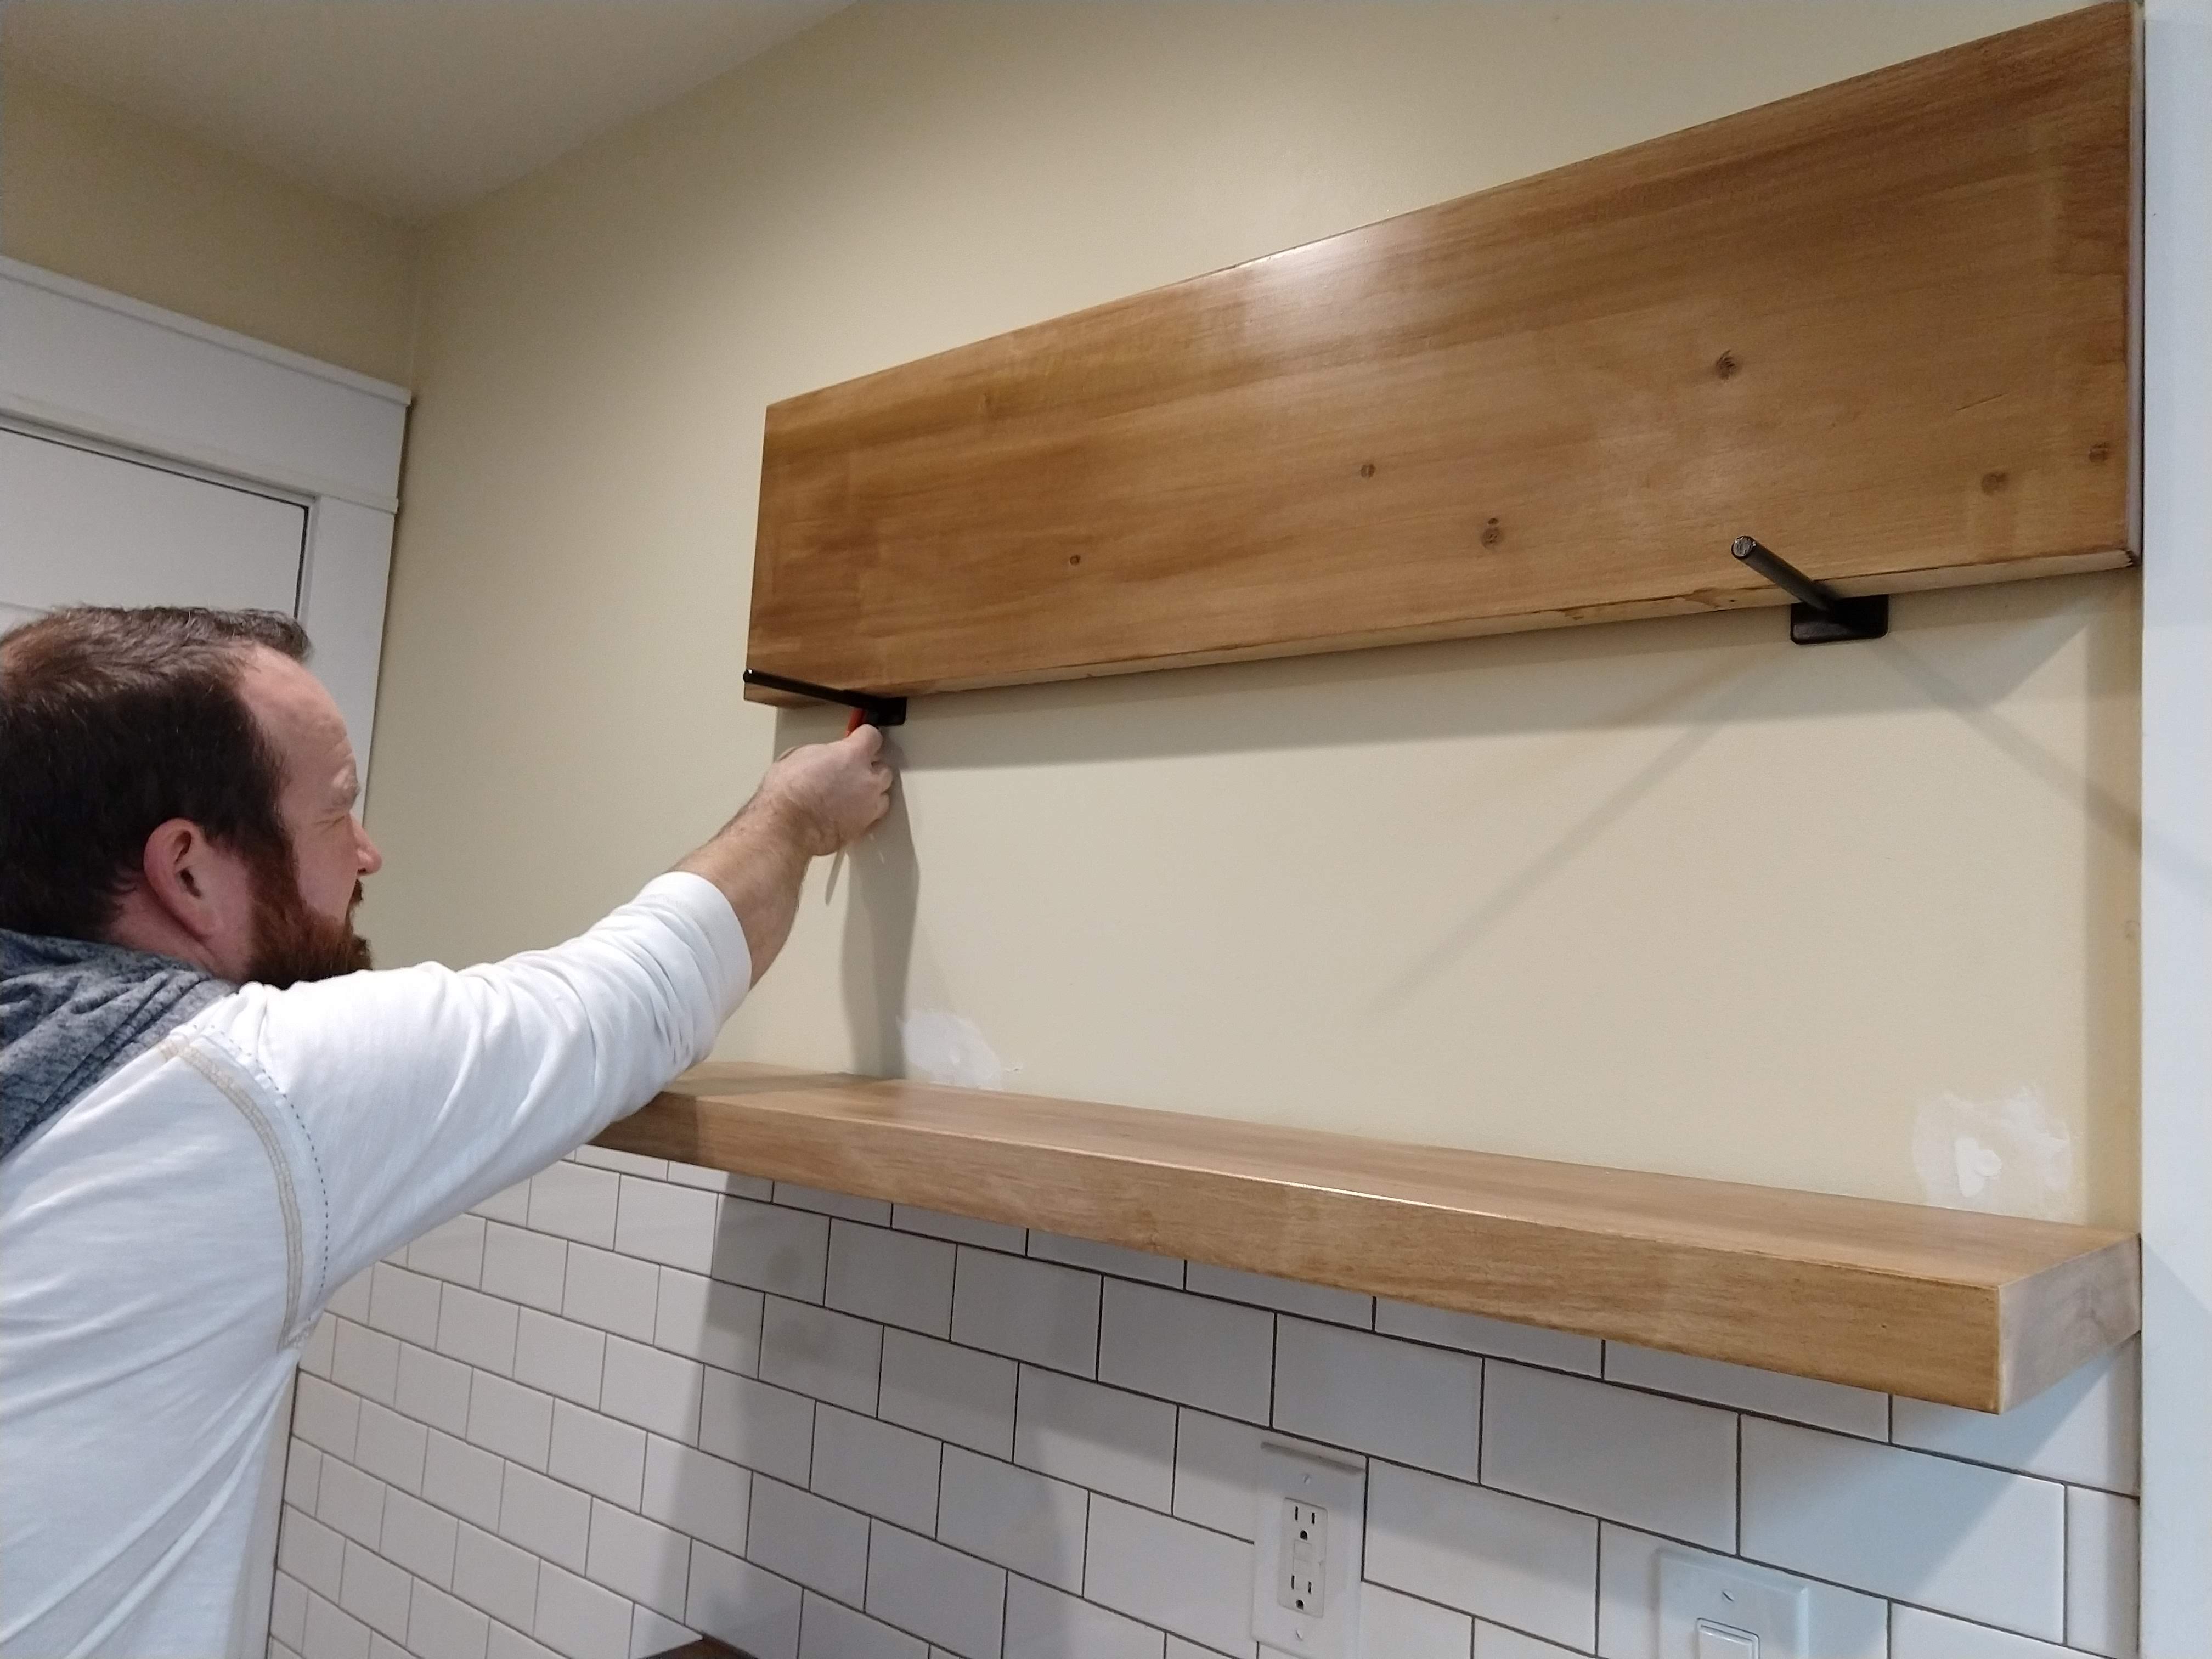
Next the shelves needed to be drilled so that we could mount them on the brackets.
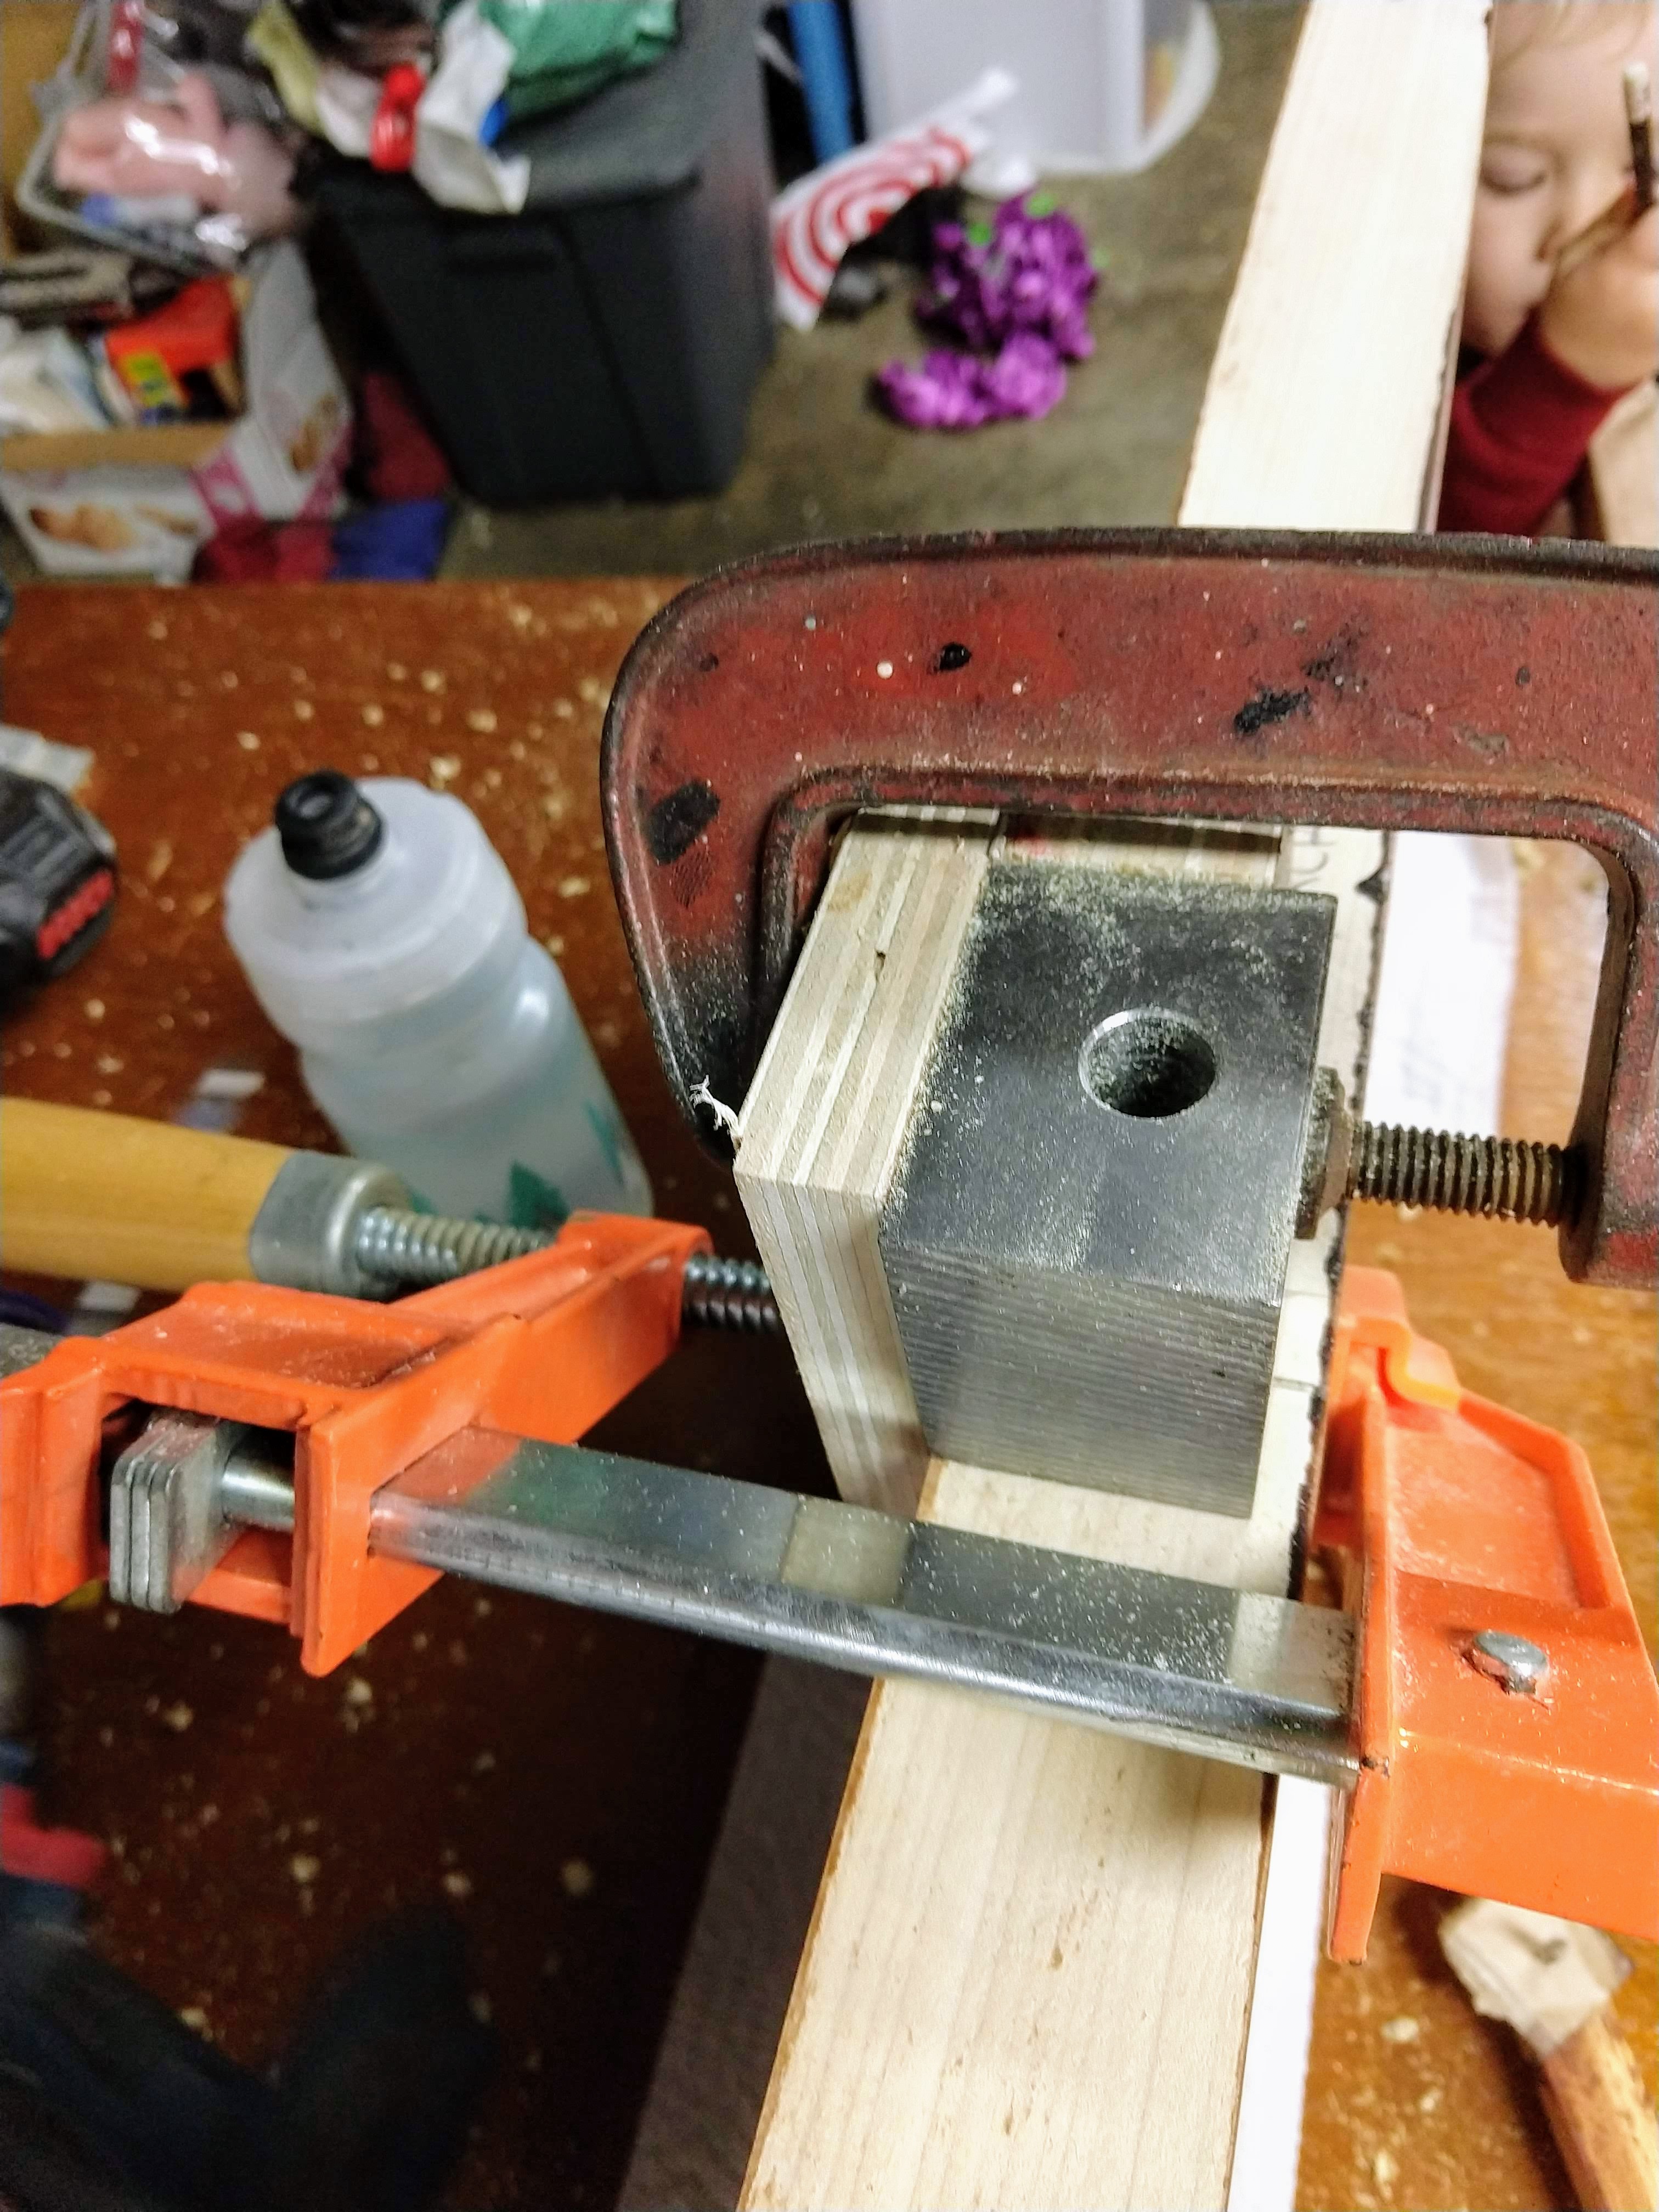
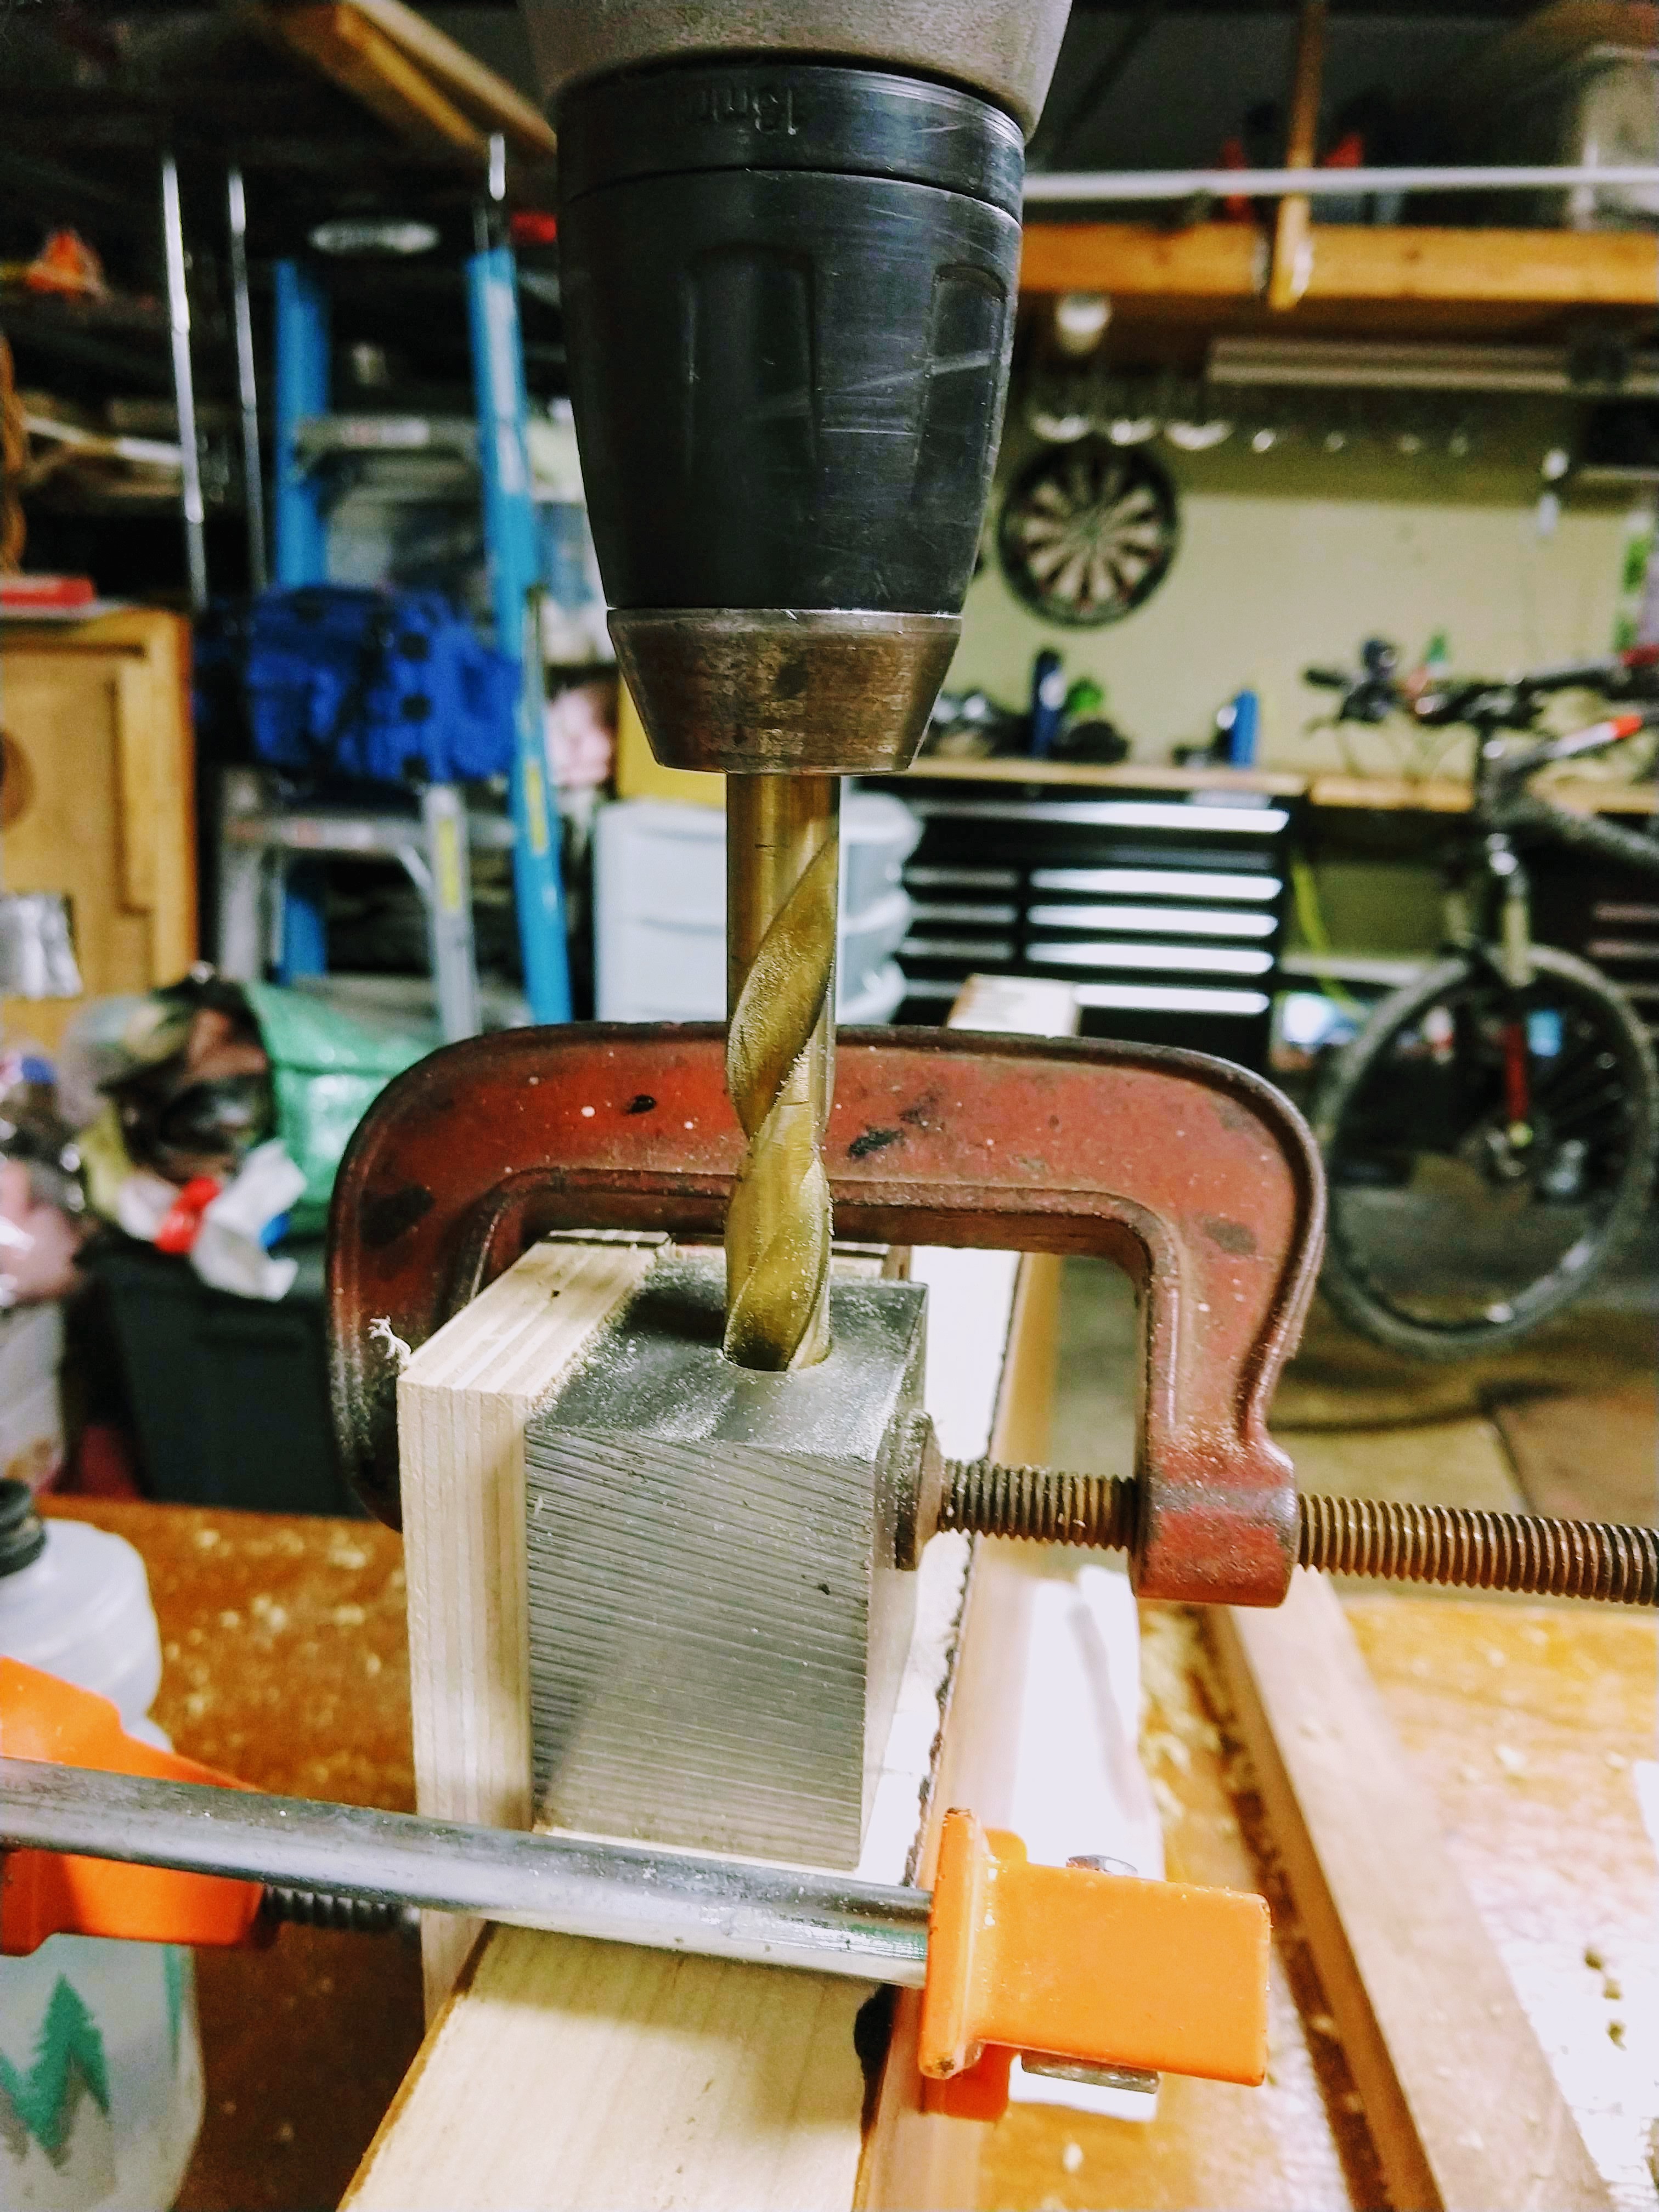
It was pretty important to get the angle of the drill bit in the proper placement, because even a few degrees off and the whole shelf will look wonky. Brian machined a steel guide to ensure the guide holes were perfectly straight. (Genius!)
Precision!
On a side note, it’s super special to get to see some of these old tools put to use. The clamp you see here was used by Grandpa Bob (Brian’s grand-dad) in his shop where Brian was first inspired to get crafty. The tradition of “shop time” has continued, and now our son Jacob has enjoyed many hours of time learning the ropes.
After the holes are drilled, the shelf simply slides on to the bracket. Brian is measuring the placement of shelf number two here.
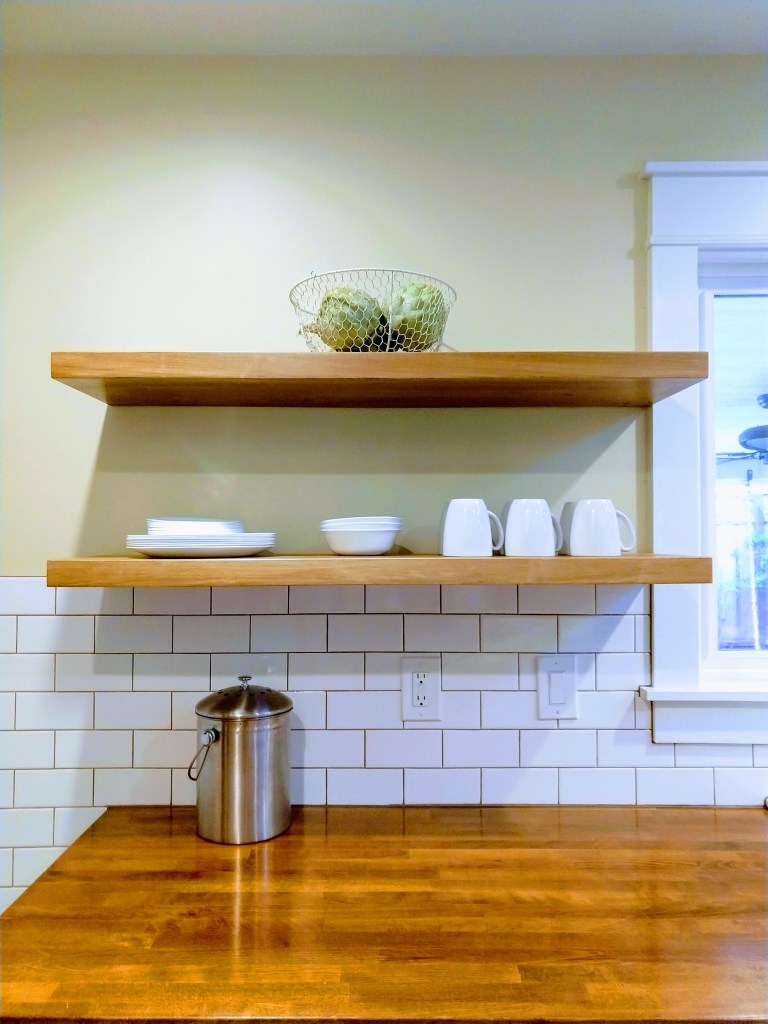
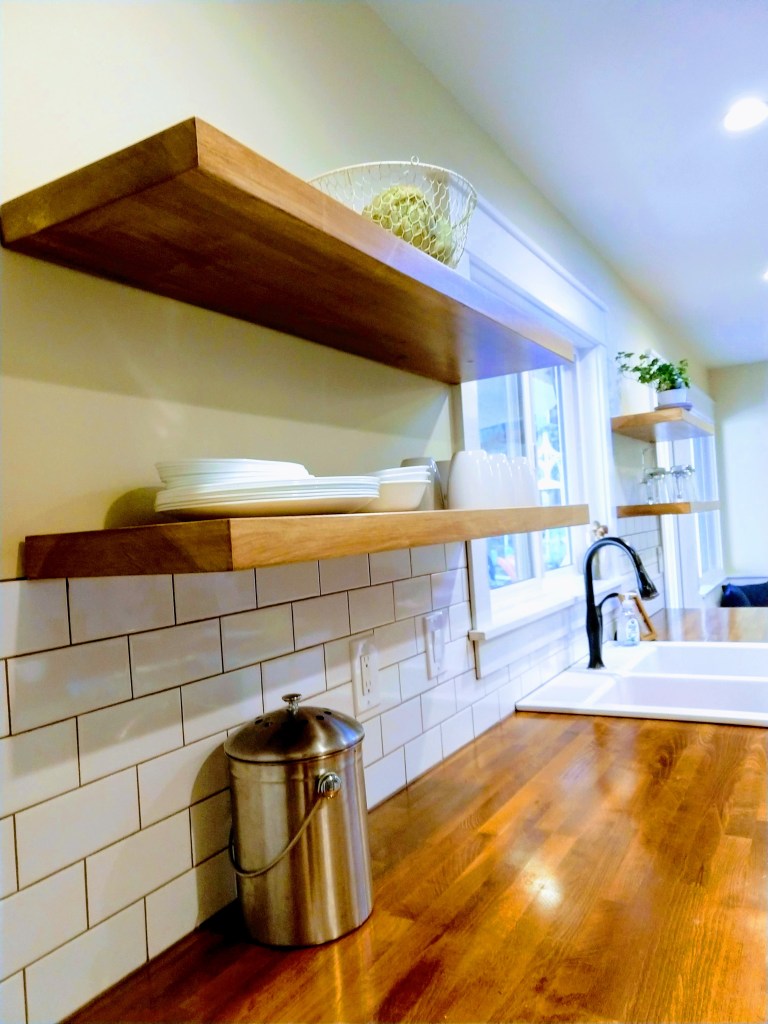
And they are up!


I hope this inspires you to get started on some of those house projects. A few hours of work can really make a big difference in the beauty of your home. Nothing is more satisfying than a job well done.
We would be happy to answer any more specific questions you might have about how we completed this project. Please feel free to leave them in the comments below!

Love the stain you guys picked out. They look great! Frames the window and really adds to the warmth of the Kitchen! Nicely done.
LikeLiked by 1 person
Ooohhh! It’s so pretty. I love the update. It looks great. It is such an improvement. You guys never cease to amaze me!
LikeLiked by 1 person